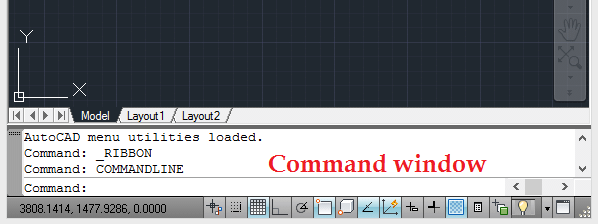
The command window in AutoCAD, for the less I can say, is where all what you are doing is being recorded. It is also the means AutoCAD uses to communicate with you. It is important to know how to use it.
All icons are shortcut of commands.
let’s take as an example the process of drawing a line in AutoCAD. What do you do when you want to draw a line in AutoCAD? You click on Line to activate the Line command.
You could as well just write LINE in the command window to activate the same command, like in this 2D autoCAD exercise. Sometime to go faster, for some very often used command, you need to remember them, specially for cases where you need to change the interface to find the icon corresponding to this command.
The most important is, while using the command window in AutoCAD, you can change the behavior of the command you are working with.
I recommend you read this post solving a simple 2D exercise in AutoCAD using the command window.
Lets start with a simple case in which we will draw a circle of Radius 10. If I type CIRCLE and hit ENTER.
- Command: CIRCLE
- Specify center point for circle or [3P/2P/Ttr (tan tan radius)]:
- Specify radius of circle or [Diameter]: 10
On step 2, AutoCAD is asking to specify the center of the circle I am trying to draw, and the part into bracket allows me to change the normal behavior of this command.
Let say I want to draw a Circle, but I want to specify the Diameter in step 3, not the radius, this is how it will look like
- Command: CIRCLE
- Specify center point for circle or [3P/2P/Ttr (tan tan radius)]:
- Specify radius of circle or [Diameter] <10.0000>: d
- Specify diameter of circle <20.0000>: 10
in step 3, I wrote “d” to tell AutoCAD I would like to enter the diameter, not the Radius and it provided me with a means to do so. Why did I enter d? because in the word [Diameter] into bracket, the letter “d” is in CAPITAL. It is also possible to enter the whole word [Diameter] to activate this feature.
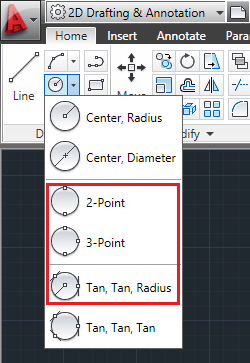
Let’s try working in changing the behavior in step 2, Let’s look at it first. in Step 2, we have [3P/2P/Ttr (tan tan radius)] which represent drawing a circle using 3 points/2 points/ 2 tangents and a radius playing the same role with icons shown on the image below.
Using the feature 3P in [3P/2P/Ttr (tan tan radius)] we will have
- Command: CIRCLE
- Specify center point for circle or [3P/2P/Ttr (tan tan radius)]: 3p
- Specify first point on circle:
- Specify second point on circle:
- Specify third point on circle:
In step 3, 4 and 5, I used the mouse to give those information by clicking on the exact point in the drawing area. It is possible to enter point’s coordinates instead.
Some command lines help you access other features easily, like the DIMSTYLE command, LAYER command, VIEWPORTS command and many more.


Comments
One response to “Using the command window in AutoCAD”
[…] start by trying to draw this simple figure below. Too simple right? The objective here is to learn how to use the command window in AutoCAD to draw without using the mouse. This will help us have a first glimpse on how the command window […]