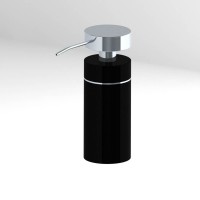
In this tutorial, I will teach you how to render your SolidWorks parts and assemblies with the use of PhotoView 360. Designers are often asked to provide virtual images of their models before the products are even manufactured. PhotoView 360 is a SolidWorks add-in that can produce photo-realistic renderings of your SolidWorks parts. The users can edit manually the appearance, scene, view settings and decals beforehand in order to get images of high quality.
Activating PhotoView 360
First, let’s look how to activate PhotoView 360. Select Tools > Add-Ins… then click on the left box of PhotoView 360 and finally hit OK.
Tip: If you want to activate this software every time you launch SolidWorks, click on the right box of PhotoView 360 in the Start Up column.
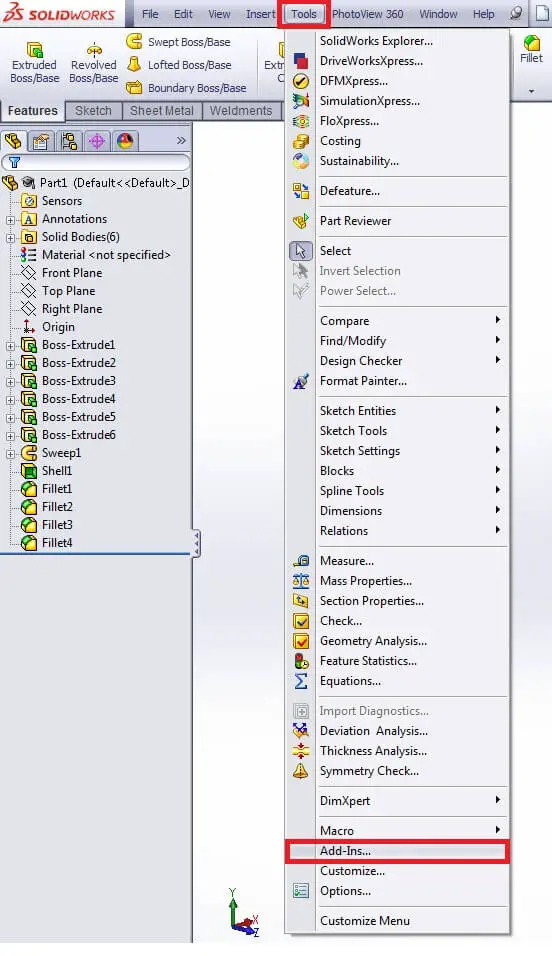
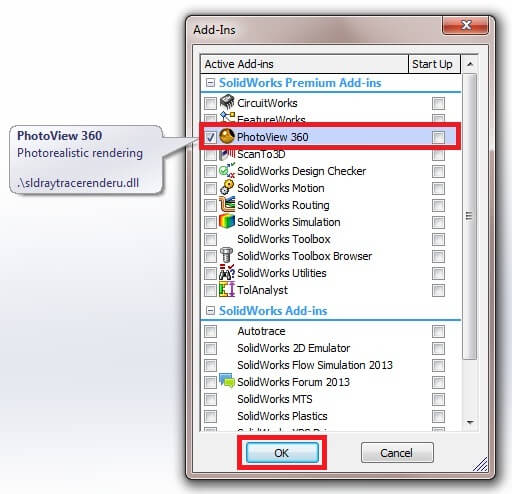
Now you can see the Render Tools tab and the PhotoView 360 drop down menu.

If you have not assigned colors, textures and materials to your models, PhotoView 360 enables you to edit the appearances of your parts selecting the Edit Appearance option. In addition, the backgrounds of your renderings can be modified exploiting the Edit Scene button. The Edit Decal option applies a decal to faces in your models.

Output Image Settings

PhotoView 360 comes with a number of controls and options in order the rendering procedures to result in a precise image of your design. Select Options to edit the rendering properties.

The window of PhotoView 360 “Options” depicts the controls the users can modify such as the Output Image Settings, Render Quality, Bloom, Contour Rendering, Direct Caustics and Networks Rendering. The Output Image Settings specifies the final image size. At this point, you can click in the Dynamic help box to get pop-up tips for each property.
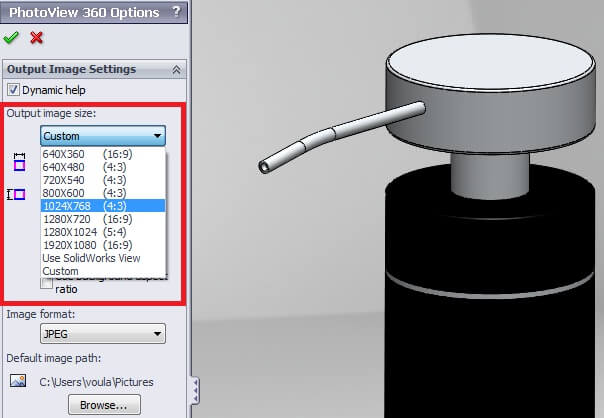
The output image size can be set using a variety of options as described below:
- Click on the drop down menu and select the size desired (e.g. 1024X768 as displayed above),
- Roll right to increase or left to decrease the size of the rendered image,
- Click on the “Up” arrow to increase or “Down” arrow to decrease the size of the rendered image,
- Type in the dimension boxes the size of the width and height of the output image.
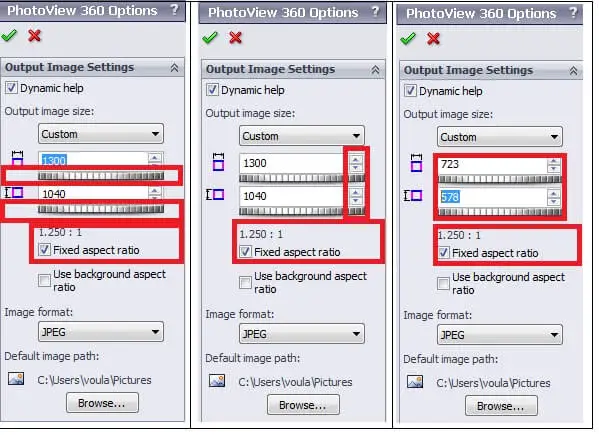
NOTE: Take into consideration that the aspect ratio (width to height) will be fixed while you are trying to adjust the image size. If you want to change the aspect ratio, you have to uncheck the Fixed aspect ratio box and type in the dimension boxes the new dimensions of the final image.
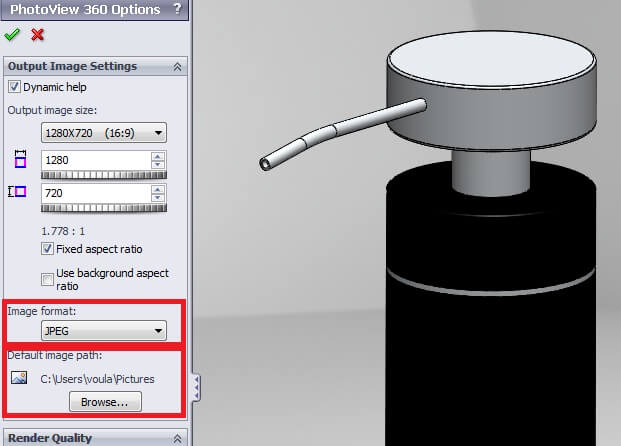
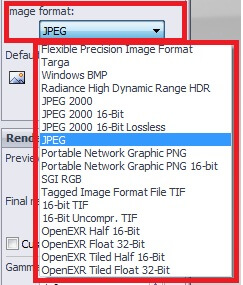
You can now choose the image format of your rendering by clicking on the corresponding drop down menu. As it is illustrated in the figure below, a great number of options is currently available. Moreover, the output image’s path can be specified by hitting the Browse button.
Render Quality
This set of options can be used to control the render quality, both of the preview and the final render image. Please note that high levels of render quality require longer compute time intervals to complete.
Tip: To reduce the compute times for your renderings, you can choose Good for the preview render quality and Maximum for the final render quality.
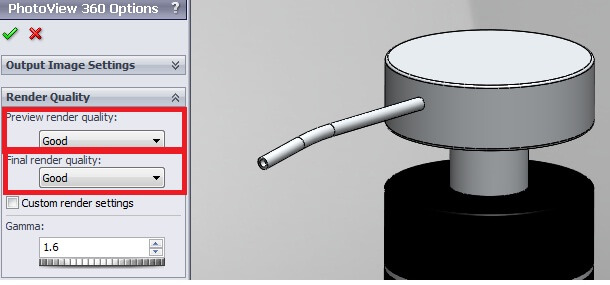
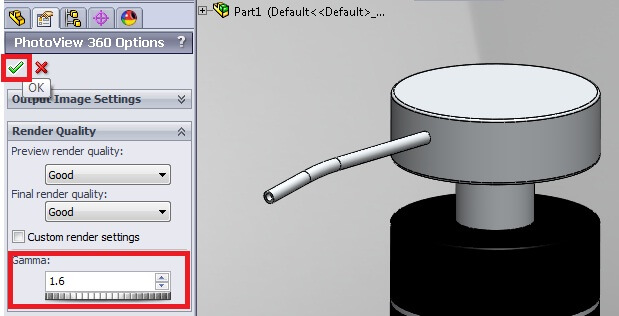
In this window, it is also essential to adjust the Gamma option. You can increase this value to get brighter colors in the midtones. On the contrary, decreasing this ratio results in darker midtones. Finally, hit OK to close this window.
Preview your renderings

Before activating the Final Render option, it is strongly recommended to preview your renderings. Exploiting this option you can get a “rough” impression of the final image and therefore you can refine the rendering parameters without the need of the final rendering. Therefore, you can save time and rapidly optimize the rendering procedures.

Any changes conducted during the preview process are immediately reflected into the preview image. However, you can pause the preview rendering by clicking on the Pause button. The preview procedure starts over again as soon as you click the Reset button. This is the last stage of the process where the users can modify any parameters before the final rendering conduction.
Final Render
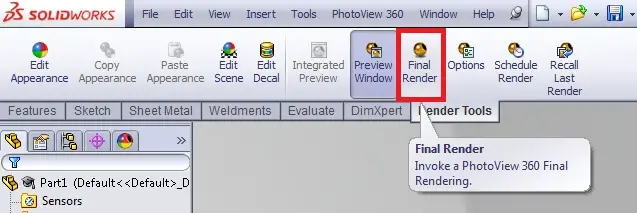
To launch the final render process, click on the Final Render button. The window of the next picture shows up. On the right hand side of the rendering window under the “Statistics” tab you can see the render times (total elapsed time, remaining time etc), and the frame settings as previously specified in the “Output Image Settings”. As it previously mentioned, the compute time intervals can get really long, depending on the rendering quality, file size etc. If you desire to interrupt the rendering progress you can just click the Abort button. Do not forget to save the output image before closing this window, by hitting the Save Image button.
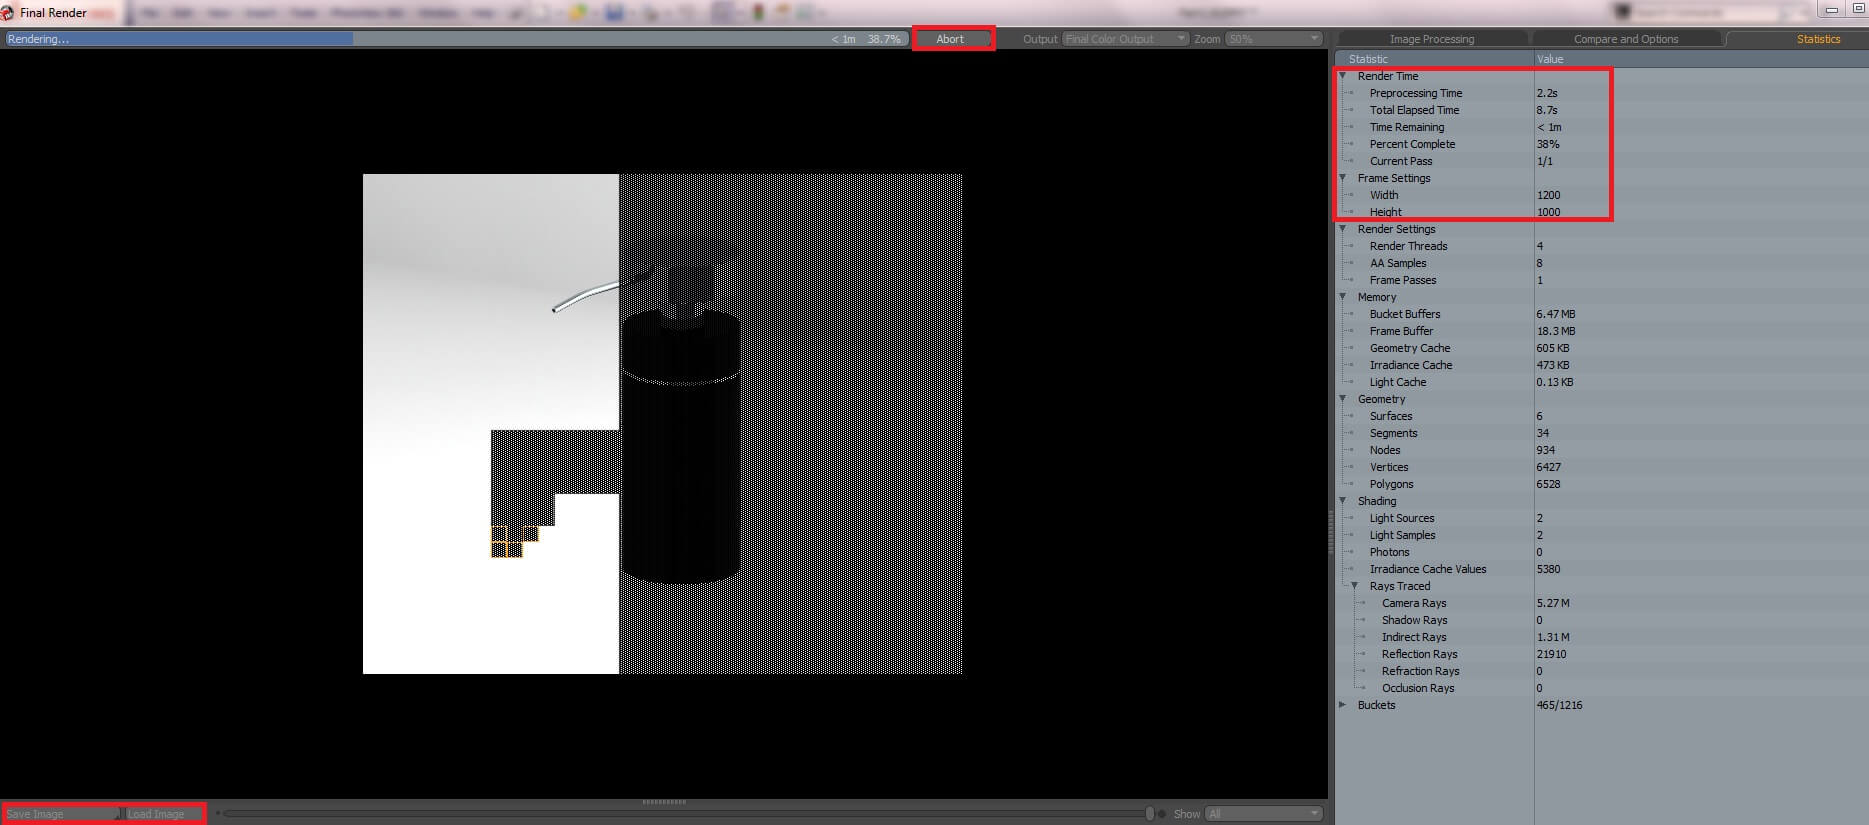

Congratulations! You have just created your first photo-realistic rendering of your own model.

