This SolidWorks decal tutorial will show you a way to add realistic visual detail to a component. A decal can be used to illustrate a feature such as a sticker or printed-on feature, and may be useful for marketing or presentation techniques.
In this example, we will look at a basic part, which can be outfitted with a decal of your choice in SolidWorks. Let’s get started!
What will you learn?
In this tutorial, you will learn the basics of decals. The specific topics covered are shown below. You may skip to certain topics by clicking on them.
[toc]
The final design will look similar to the one below:
Creating a new Decal Using an Existing Image File
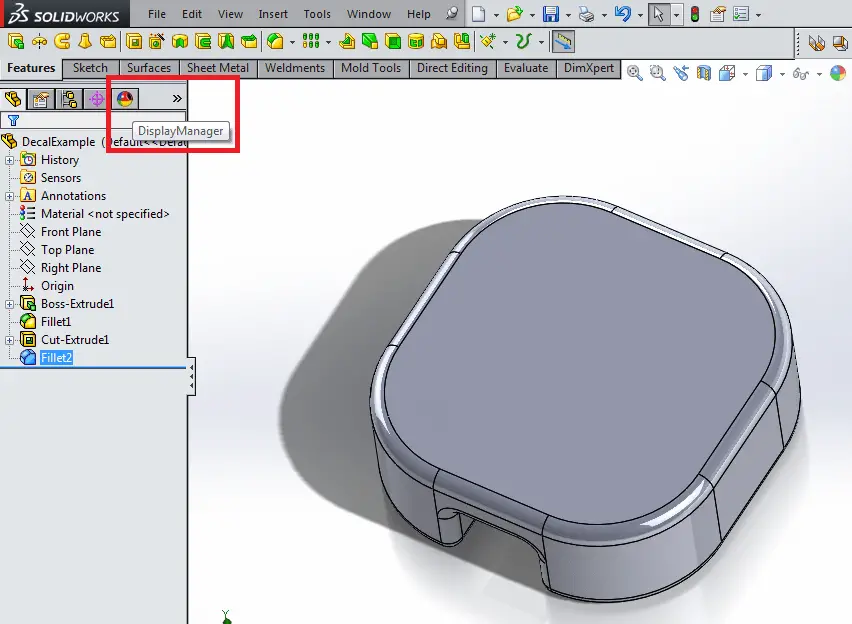
First, make sure you have a decal you’d like to use saved as an image file, such as a PNG. Click on the Display Manager tab in SolidWorks, on the left side of the screen. The feature looks a bit like a multicolored sphere.
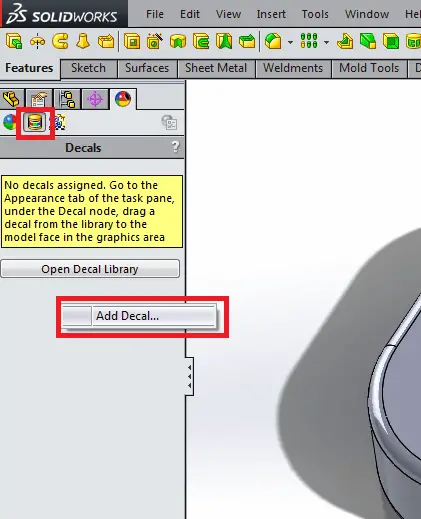
Now, in the Display Manager tab, select the Decals icon. Now, right click in the gray space and select “Add Decal…”.
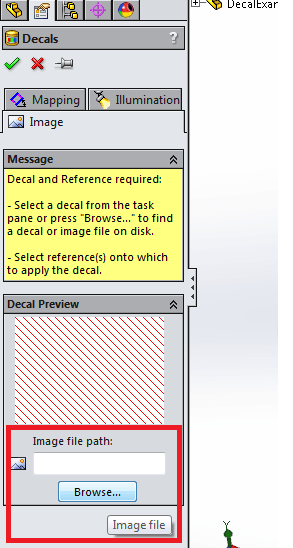
Now, you can browse to the location on your computer where the image you would like to use as a decal exists. Select Browse to specify the image path in Windows.
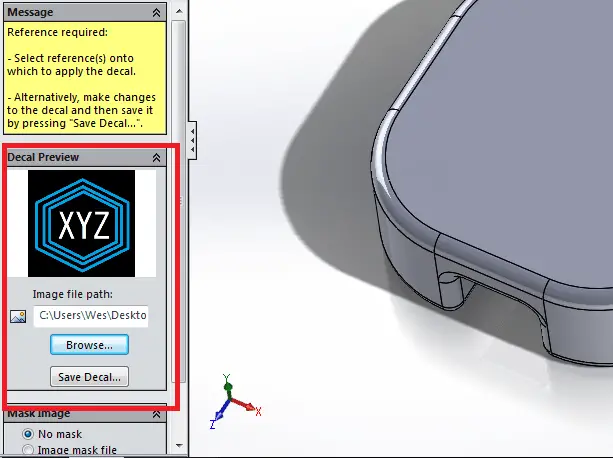
When you’ve located the image, select OK, and a preview will appear in the Decal Preview pane. You can make several types of modifications to the decal, such as changing its transparency. For this tutorial, we’ll use the decal as it is.
Here we’re using a simple fictitious logo with the white letters “XYZ” inside a series of light blue polygons, against a black background. Select OK.
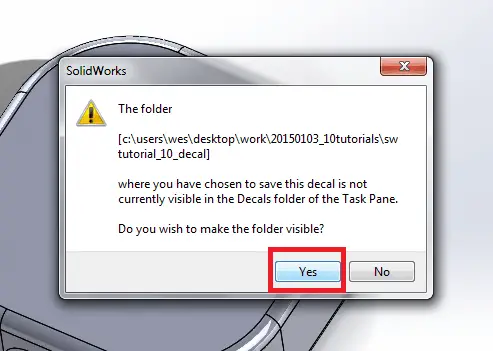
You may get a message with the notice “The folder…where you have chosen to save this decal is not currently visible in the Decals folder of the Task Pane. Do you wish to make this folder visible?” Select Yes.
Now that you’ve done this, you’re ready to add the custom decal to your part.
Adding the Decal to SolidWorks Model
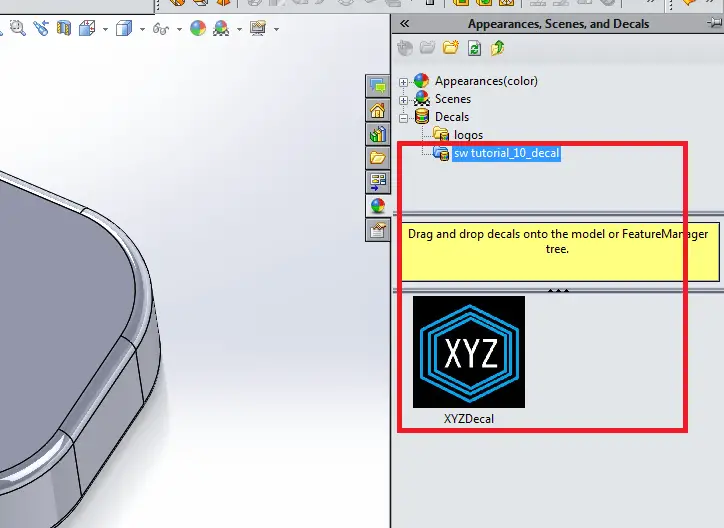
Now, click on the new subfolder under the Decals icon on the Appearances, Scenes, and Decals pan on the right side of the SolidWorks work environment.
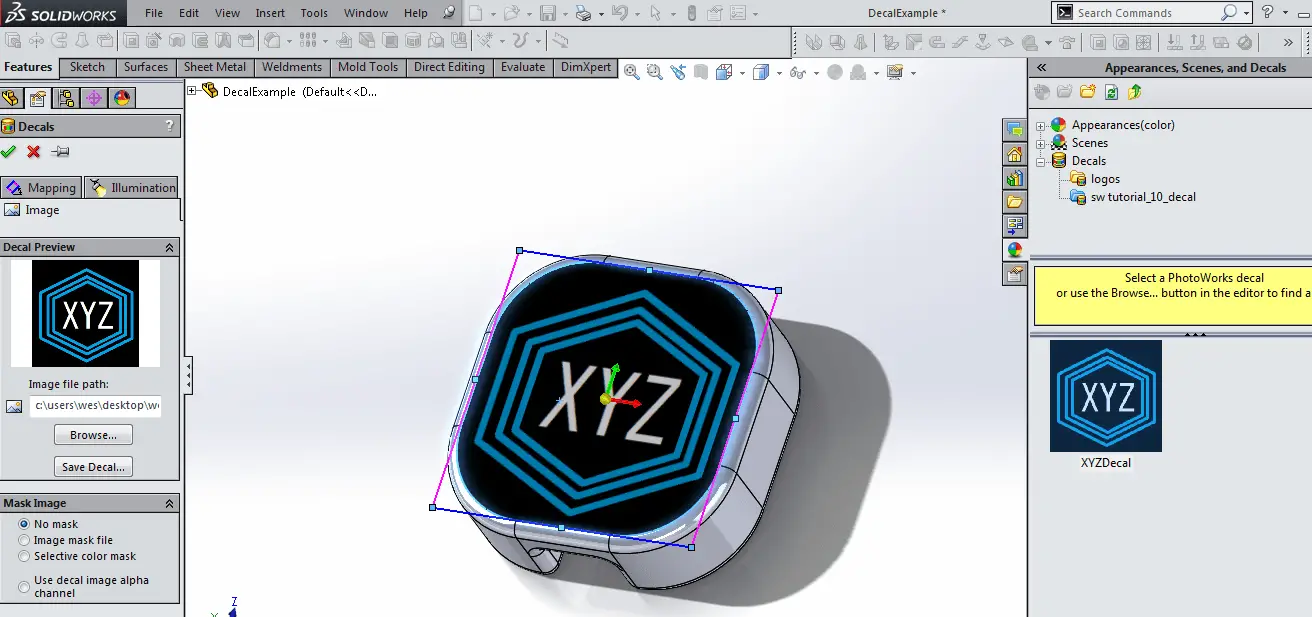
With the new folder highlighted, you will notice that the decal you saved from the image file appears in the space below. In order to add the decal to you part, all you need to do is click and drag the small image onto a face on your part. Here, I have selected a large flat face where the decal will be easily visible.
If the decal is larger than the face upon which it is dropped, it will completely fill the face. Its location can be easily adjusted using the drag axis icon, but should appear relatively centered by default. You may still modify the way the image maps across the surface topology using the Mapping tab in the Decals feature tab on the left side of the screen. Illumination may also be modified.
Final Thoughts
If you followed the steps correctly, your model should look like the image above! Congratulations – you’ve successfully added a decal to your part. I hope you found this tutorial useful for creating customized parts in SolidWorks. Try the other tutorials that are available.

