Here is a quick Draftsight tutorial where you will get a first glimpse of how to handle basic commands from the Draw toolbar.
Drawing with Draftsight is a heavily computer-assisted task where the name CAD, you will notice in the following that once you understand the concept of letting your path being guided by the software, you easily get used to using tools.
Putting a little bit of order before we start.
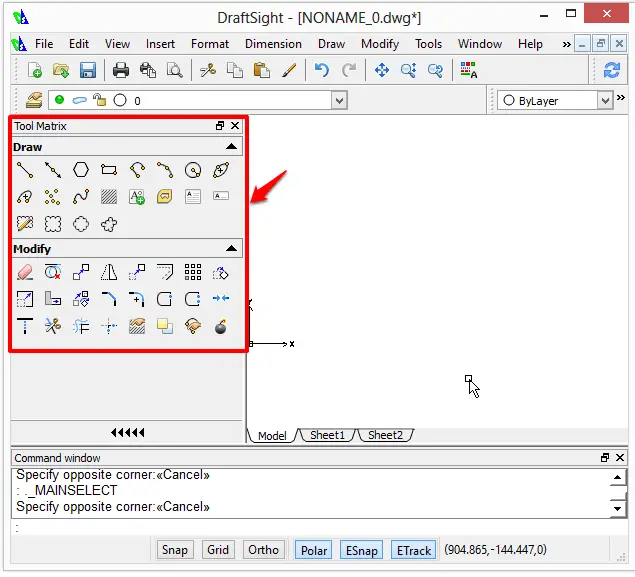
I would like to use the Tools matrix to order my toolbars a bit more different than they are now.
Using the technique shown above, my Draw toolbar and my Modify toolbar will look like this.
Now let’s play with the Draw Toolbar.
Drawing a Line in Draftsight
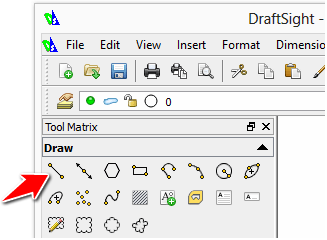
Drawing a line is the first thing to learn while using any CAD software. A line is defined by its starting point and its ending point. To Draw a line with Draftsight, you will have to:
- Activate the LINE command. You can activate the LINE command by a click on its shortcut icon in the DRAW toolbar or by typing “LINE” and hitting the ENTER key of your keyboard.
- Choose the starting point of the line (just with a click on the drawing area)
- Choose the ending point of the line
- Hit ENTER or ESC to end the command
While using the LINE command, there is a sub feature of the command that makes you draw a SEGMENTS. If you want to Draw a segment:
- Activate the LINE command
- Type: S
- Choose the starting point
- Choose the ending point
- Hit ENTER of ESC to end the command.
Both looks similar right?
There are actually different. When you use the first method, the end of the first line you are drawing is the beginning to the second line you are about to draw, but when you use the second method after ending the first segment, you are free to start the next segment wherever you need to, got the idea? ok!
NB: After activating a command, the next step corresponding to the command is instructed via the command window. If you pay attention to the command window while working, you will actually notice that Draftsight is guiding you by telling you what next to do.
Drawing a Rectangle in Draftsight
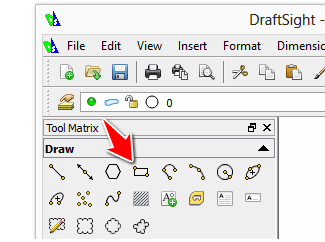
To Draw a RECTANGLE in Draftsight, you can use the RECTANGLE command or simply draw 4 segments to form your rectangle. If you want to use the RECTANGLE command, follow these:
- Click on the RECTANGLE command icon
- Click in the drawing window to specify the first corner of your rectangle
- Expand and click the second time to finish drawing your rectangle
What if you want to design a rectangle with specific dimension?
- Click on the RECTANGLE command icon
- Click in the drawing window to specify the first corner of your rectangle
- Type D (to tell Draftsight you want your rectangle to have Dimensions)
- Draftsight prompt you to enter the value of the horizontal dimension: type the value and hit ENTER
- The Draftsight prompt you to enter the value of the vertical dimension: type the value and hit ENTER
What if you want to design a rectangle with specific Area?
At step 3, You can type A like AREA, to draw a rectangle with a precise area or type R like ROTATION to draw a rectangle bent with an angle.
We will stop here and will continue in the next tutorial with Drawing basic shapes in Draftsight.


Comments
2 responses to “Drawing basic shapes in Draftsight”
[…] We have seen briefly how you can draw a line in Draftsight when we’ve learned how to draw basic shapes in Draftsight. […]
[…] We have learned earlier how to create basic objects in Draftsight. […]