This post is all about views in technical drawing. This is a reminder, specially for those who will be heading to those AutoCAD 3D tutorials I published here earlier.
There is need to remember some basic principles about technical drawing while using any CAD software, here we are all about VIEWS.
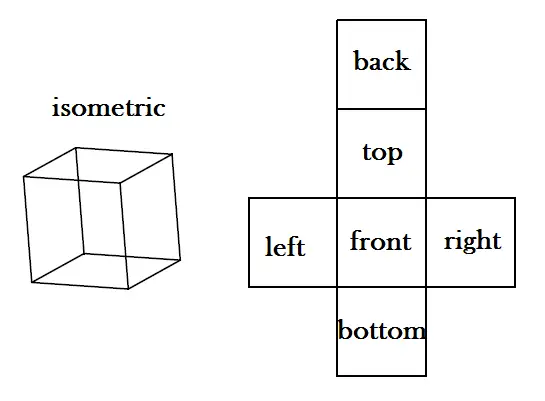
It is common to be confused and be like, where is the top view, bottom view, left view, right view, front view, back view are supposed to placed while representing a 3D object in 2D?
Here is the conventions of placing view in technical drawings
Different CAD views
Here is what each view represents when putting 2D face apart.
It can be sometime confusing, but the aim of the2 2D representation is to help you have a clear opinion about what the 3D object look like in a certain view.


