This exercise is designed to help you learn new commands like Multi-Sections Solid, Shell and more.
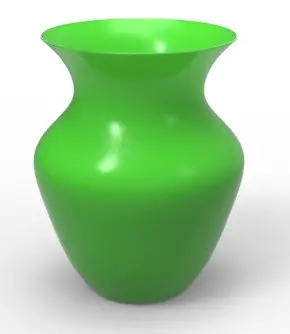
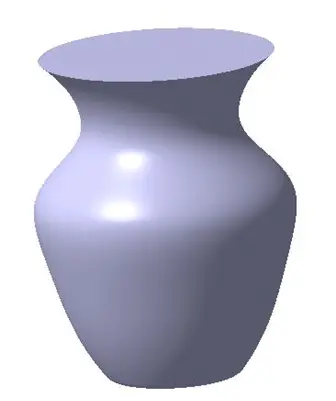
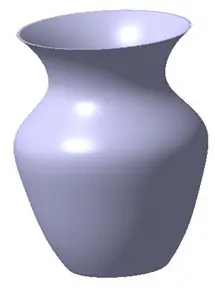
The figure below shows a flask which we will use as goal to help us have a reason to play with CATIA today.
This flask has nothing but basic rounded shape, and it should be an easy to do work for any beginners looking to learn how to master 3D technique in CATIA.
I will go Step by Step to help you grasp all and make you able to easily replicate the following image using your software.
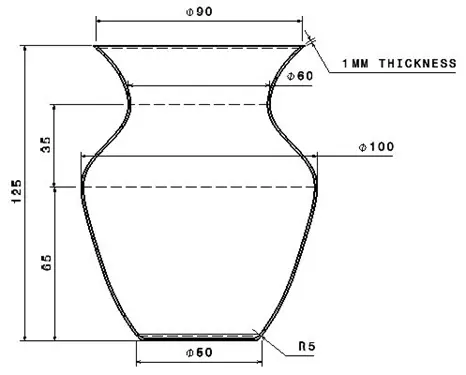
Here are dimensions needed for our flask.
In the drawing, we can observe, there are total of four sections.
Section 1: at base, Φ50
Section 2: at a distance of 65mm from base, Φ 100
Section 3: at a distance of 35mm from section 2, Φ 60
Section 4: at a distance of 125mm from base, Φ 90
And no radius of curvature at different sections is given, this makes us not to be able to use the Shaft command.
We will use Multi-Sections Solid option instead.
Let’s create the object step by step.
Step 1
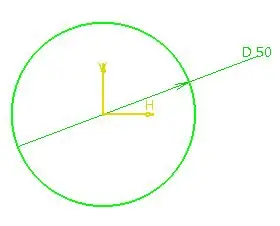
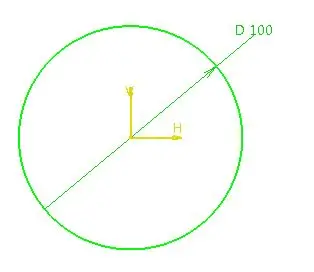
Create a circular section of Φ50 on base plane.
Step 2
Now we have next cross section of Φ 100, at a distance of 65mm from 1st section. Until now, we have been drawing sketches either on base planes or on the surfaces of solids, now we will see how to draw a sketch on a plane, which is offset from base plane.
Let’s see how to offset a plane.
In the Reference Elements toolbar you will find Plane option.
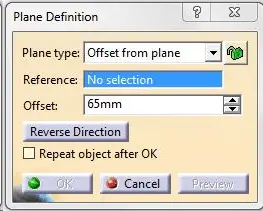
When you click on Plane, the following dialog box will pop up.
- In the ‘Plane Type’ select ‘Offset from plane’.
- For ‘Reference’ select the base plane.
- In ‘Offset’ give required distance and click OK.
On this plane, draw 2nd section.
Similarly, draw remaining two sections.
Step 3
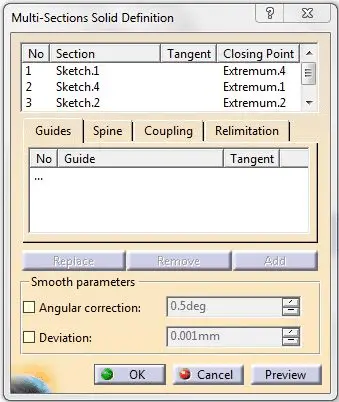
Now we will see how to use Multi-Sections Solid command. In the Sketch-Based Features you will find Multi-Sections Solid command.
After clicking option, you should have the following window.
Select sections in sequence. And in Coupling tab, in ‘Sections coupling’ select ‘Ratio’. Check the preview and Click OK. You will now get following object.
Step 4
Give Edge fillet of 5mm radius to the bottom edge.
Step 5
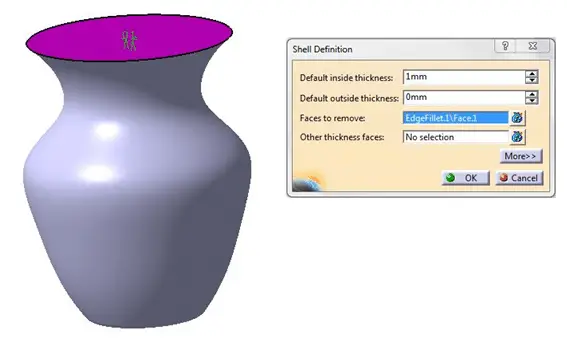
Now, in Dress-up Features toolbar, there is Shell option. To make the flask hollow. We will use Shell.
Select the face you want to remove. In this case it is top face as shown. In Default inside thickness, give appropriate thickness value and click OK.
After Shell, we will get our final part.


