This is the first post of a series of 10 posts in which I intend to go through 10 3D CAD exercises for CAD beginners. In this series I will be using AutoCAD, a free version of this software is available for download on AutoDesk website.
I suggest for you to have a look at these 2D AutoCAD exercises before diving into this session.
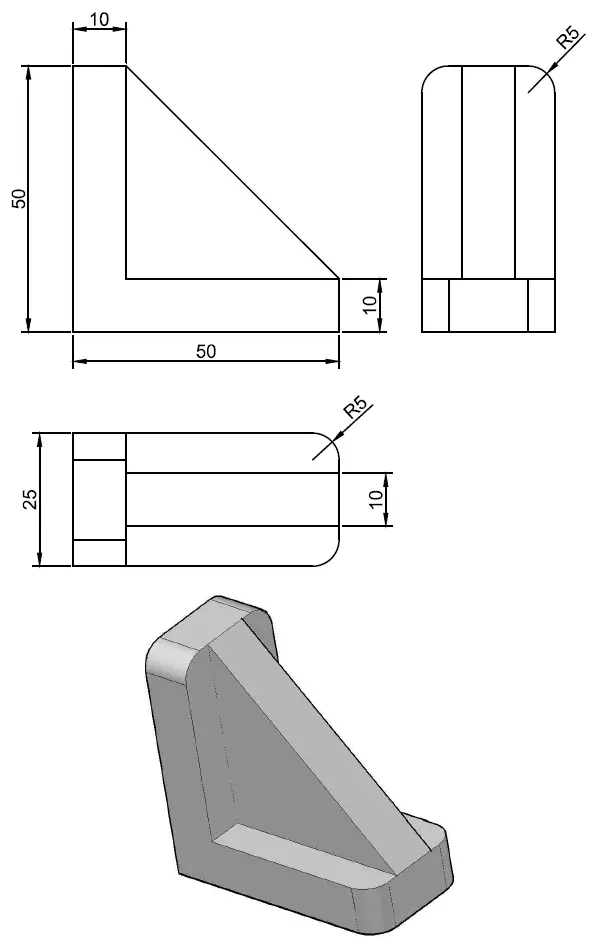
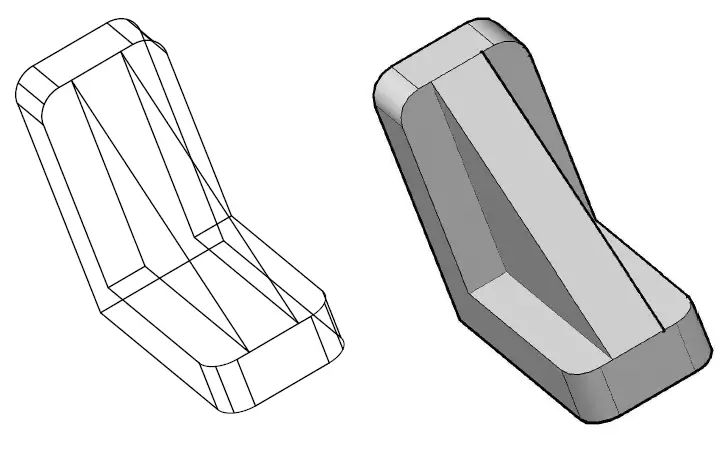
The image below displays what we will try to draw today.
Step 1
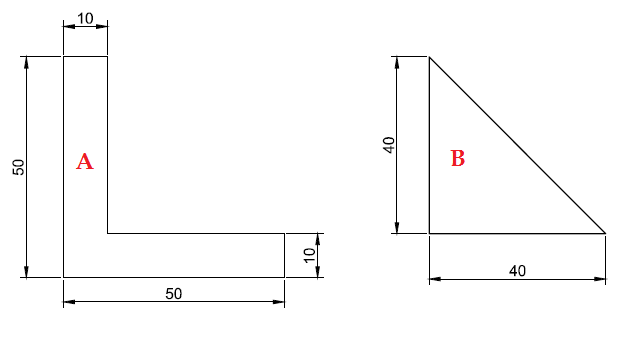
Draw the figures below.
Step 2
After drawing A and B, use the REGION command to unite all the pieces.
To use the REGION command:
- Write REGION
- Hit ENTER on your keyboard
- Select all lines
- Hit ENTER
After using the REGION command, Use the EXTRUDE command on A with 25 and on B with 10.
Step 3
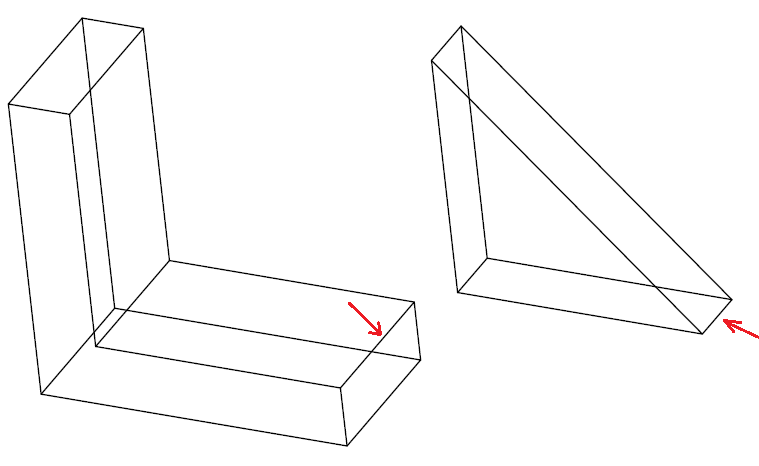
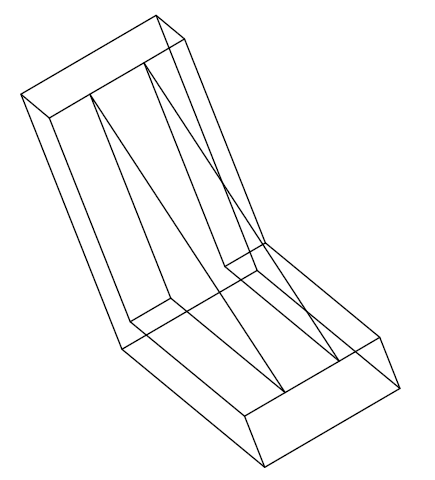
Use the FREE ORBIT option to place yourself in the view similar to the one below.
Step 4
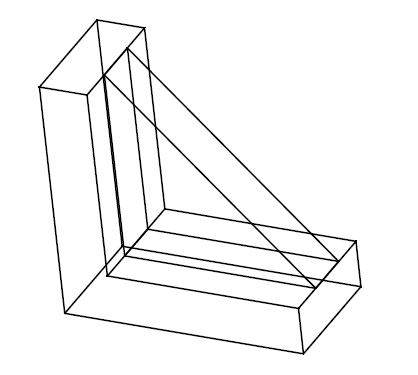
Make sure your settings are correct in order to be able to MOVE the B figure from the center of the line shown with the red arrow to the center on A figure of the line pointed with the red arrow. After doing so, the figure should look similar to the one below.
Using the UNION command
- UNION
- Select objects: Specify opposite corner: 1 found “Select A”
- Select objects: 1 found, 2 total “Select B”
- “Hit ENTER”
Step 5
Use the UNION command to unite A and B together.
Step 6
Use the FILLET command to get the four rounded corners with a radius of 5.
Using the FILLET command
- FILLET
- Current settings: Mode = TRIM, Radius = 5.0000
Select first object or [Undo/Polyline/Radius/Trim/Multiple]: “Select object” - Enter fillet radius or [Expression] <0.0000>: 5
- Select an edge or [Chain/Radius]: “Select the edge”
- 1 edge(s) selected for fillet.
I hope these posts help you learn more and at the same time, give you a start in 3D CAD. Feel free to share your thoughts below


Comments
2 responses to “AutoCAD 3D tutorial for beginners”
very good for me. thank alot
thanq