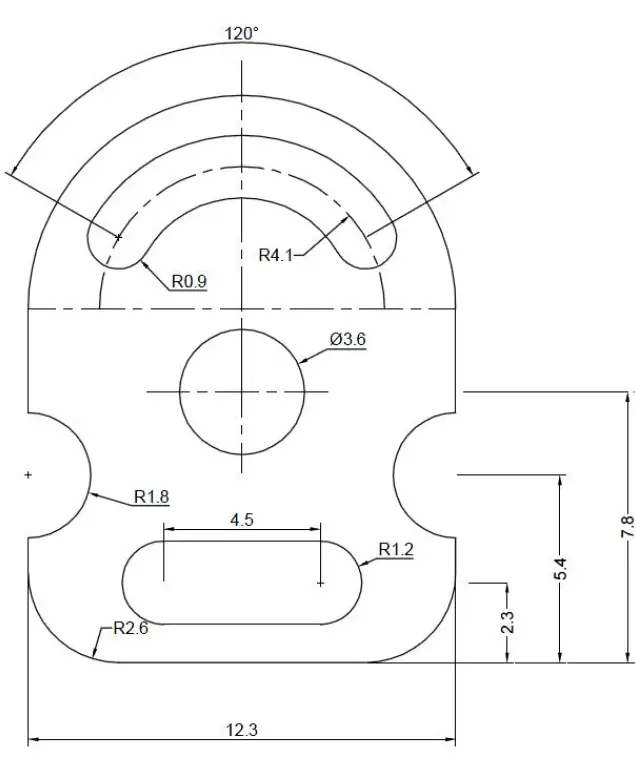
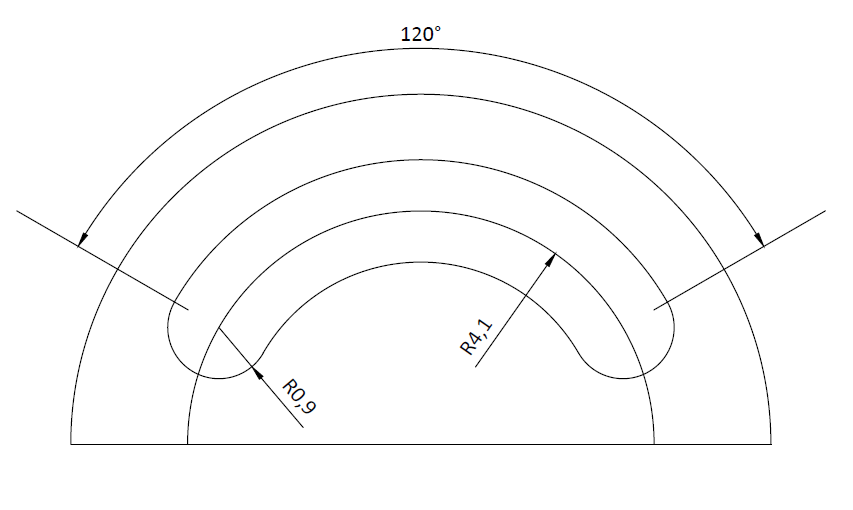
today’s assignment is the following. We have the image down below to replicate using AutoCAD. You must have noticed the Dashed Thin Lines with Dots. We will not only be using continuous thin lines today, we will be using other types of lines as well.
Today, we are going to learn how to create Layer in AutoCAD. and how to change line types.
Hint
how to draw the top part of this exercise.
You can use the CIRCLE command combined with the OFFSET command. Or simply using circles.
Method #1
Using the CIRCLE command and the OFFSET command.
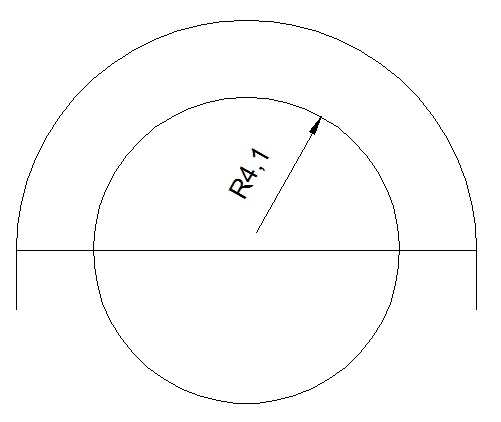
Step 1
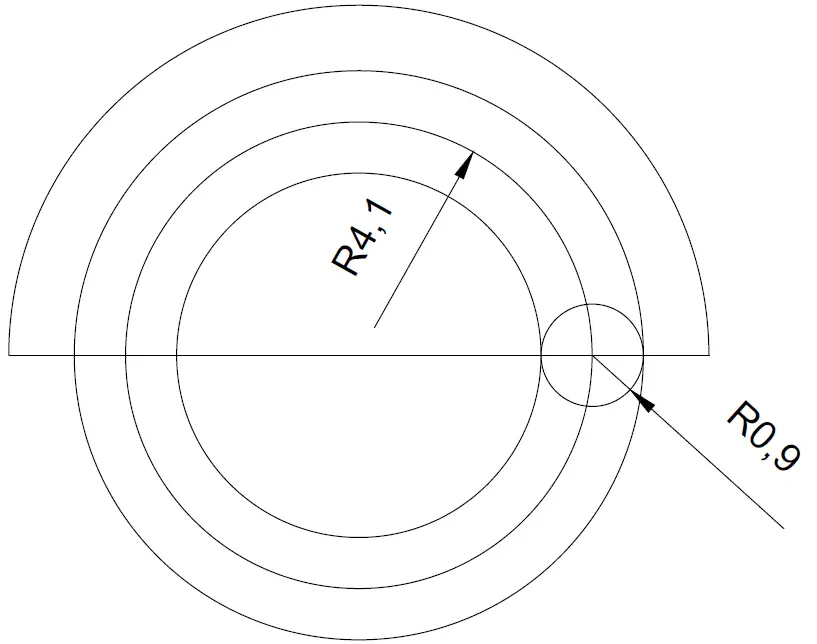
Draw the figure below
Step 2
Use the OFFSET command with an offset distance of 0.9 to get one circle outside and another inside of our already drawn circle.
To use the OFFSET command
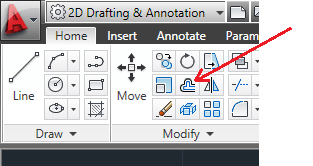
1- Click on the OFFSET icon
2- Current settings: Erase source=No Layer=Source OFFSETGAPTYPE=0
Specify offset distance or [Through/Erase/Layer] <Through>: 0.9
3- Select object to offset or [Exit/Undo] <Exit>: Select the circle of Radius 4.1
4- Specify point on side to offset or [Exit/Multiple/Undo] <Exit>: Click inside the circle
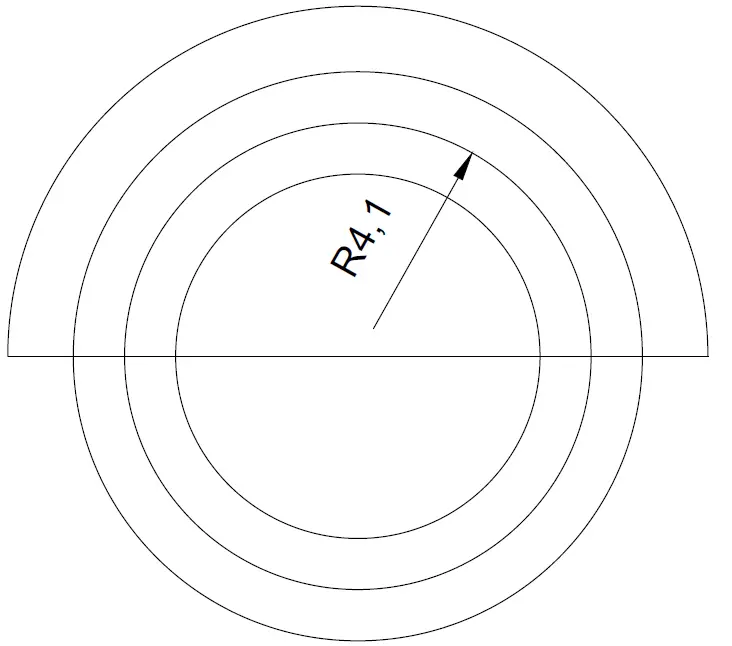
Repeat the same to obtain the outer circle
You should get this
Step 3
Draw a circle of R 0.9 as shown in the figure below. The center is the intersection of the circle of 4.1 of radius and the straight line.
Step 4
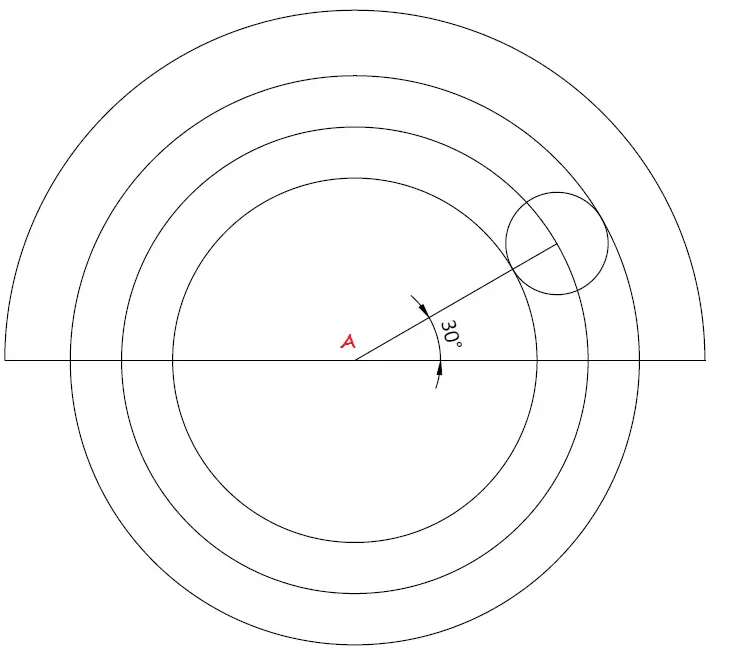
Rotate the Circle with an angle of 30 degrees from the center point A using the ROTATE command.
Step 5
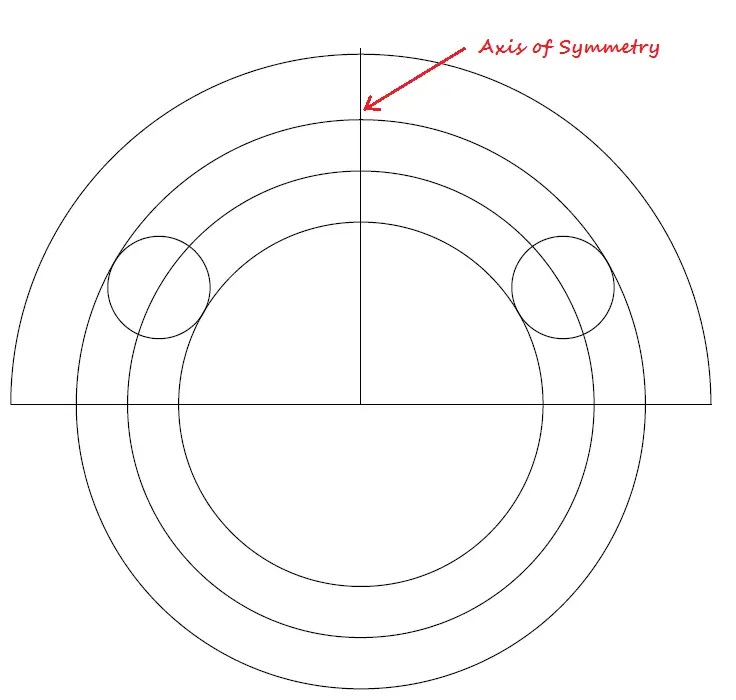
Use the MIRROR command to get an identical circle at the same position on the left side of the drawing
Step 6
Use the TRIM command to clean up
Method #2
You can create a circle of radius (4.1-0.9=3.2) and a circle of radius (4.1+0.9=5) both having the same center as the circle of radius 4.1. This will have you not to use the OFFSET command. After drawing those circles, jump to step 3 in the method #1
How to change line types.
method #1
Changing object properties
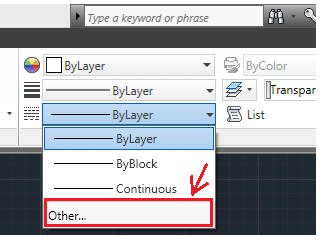
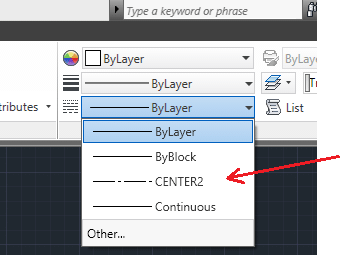
To load a new line type, Click on Other…
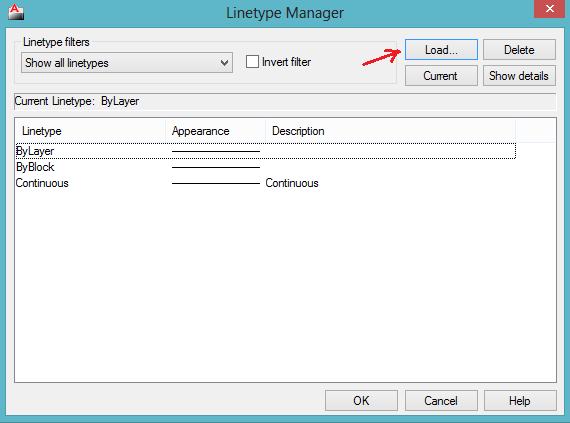
Click on Load
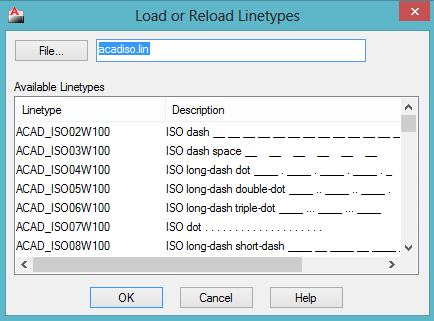
Find the Linetype you would like to add
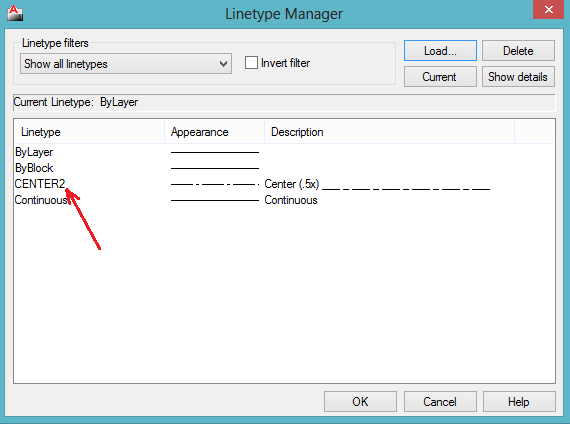
After Loading it, it now appears in the Linetype Manager
To change the Linetype of an object, simply select the object first, and select the Linetype you want the object to be made of.
method #2
Using LAYER command
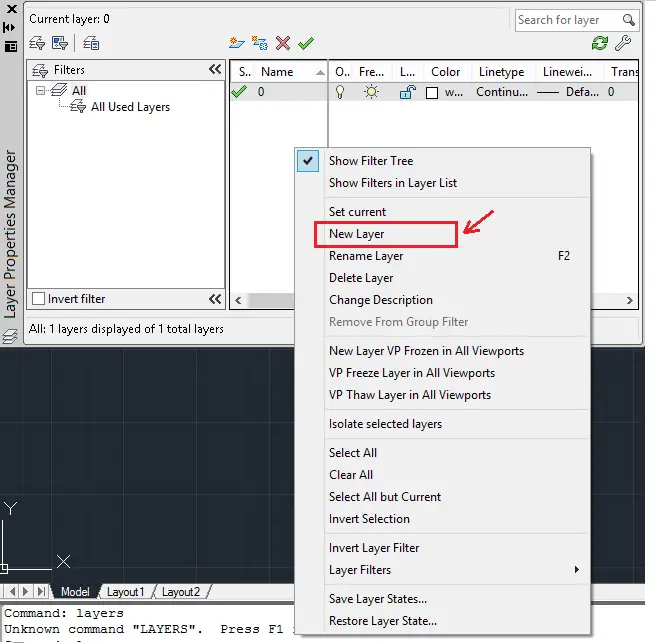
Type LAYER and hit the ENTER key
Right click in a blank area in the new window
Click on New Layer
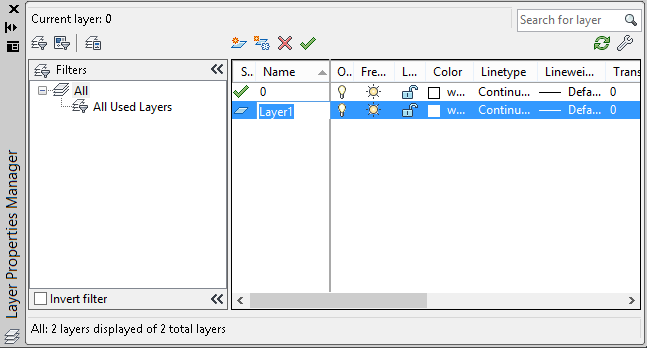
The following window pops up. Here you can change the color, Lineweight and Linetype of a particular Layer. The default Layer’s Name is Layer1. To change its Linetype, Simply click on Continuous, and you will be taken to a window similar to the one in the previous method. Load a new Linetype, Select the appropriate Linetype and hit OK.
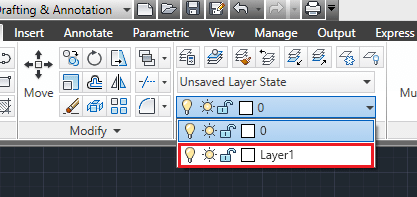
Now, to put any object in this layer, Simply select the object and Select the Layer you want it to be in.
Feel free to drop a comment below if there is something you still have difficulties to execute today’s exercise. Do not forget to like if this helped you.
[ws_table id=”3″]




Comments
One response to “20 Days of 2D AutoCAD exercises #14”
Line type is not showing center 2 type on drawing