Welcome to one more 3D exercise.
We will be having fun learning how to draw a soap case in CATIA.
This exercise is designed to help you learn new commands from Part Design.

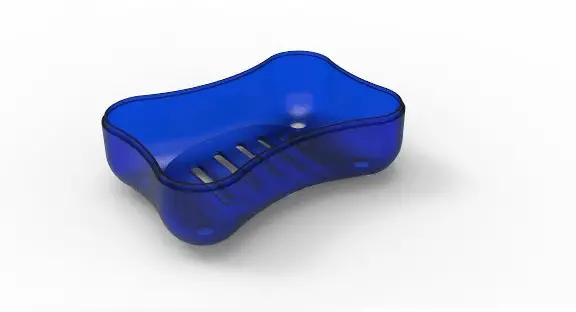
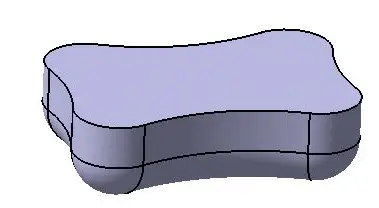
Most time for beginners, its easy to test your CAD skill on things you see everyday. it is a nice and simple way to detect your weaknesses and know things you still need to learn about. As a CAD designer, you need to have good image at the end of your project, as close as possible to reality.
This will be fun drawing this soap case, which from the image above is rendered with a plastic material.
let’s do it.
Step 1
Draw a sketch as shown below and extrude it with 30 mm. You can approximate dimensions if you want, but make sure you scale all side right to have a similar looking object.
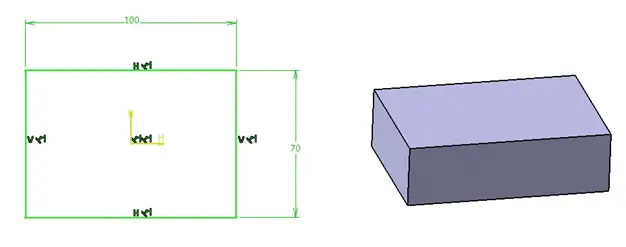
Draw sketches as symmetric to axis as possible.
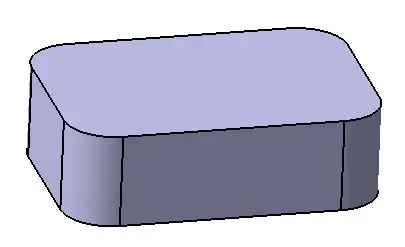
Step 2
Give proper rounds at the sharp edges as shown.
Step 3
Remove material from above block with the help of sketch shown.
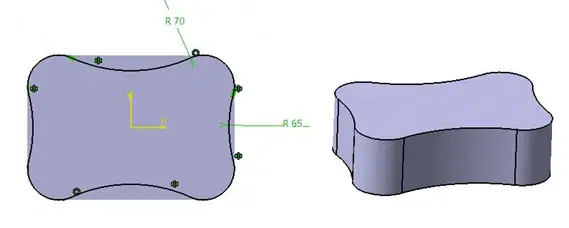
As we are using a closed sketch to remove the material, it will try to take inner side by default to remove material, but we want to remove material from the outer side. Here we use Reverse Side option from Pocket Definition dialog box.
Step 4
Give Edge Fillet to bottom edge. It will maintain tangent continuity for the edge fillet.
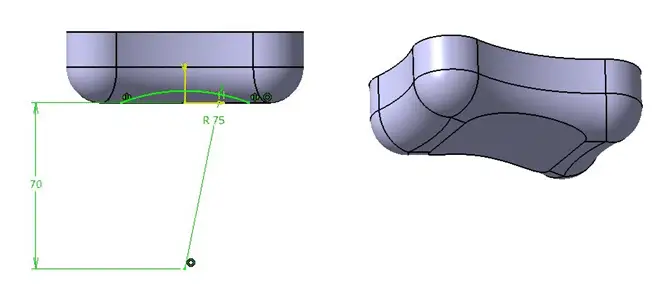
Step 5
Now using following sketch, remove material so to obtain bottom curvature for the case.
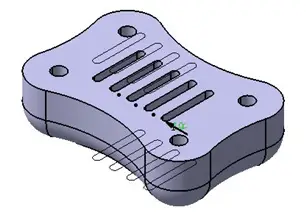
Step 6
Now using this sketch, we will make a pocket.
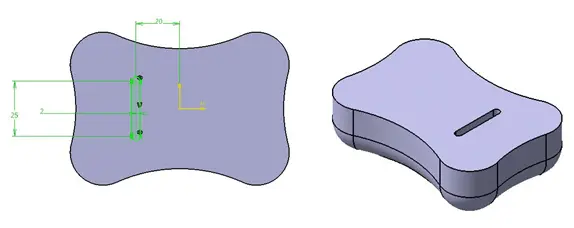
Also at any corner of the case, out of 4 corners, make a hole as shown.
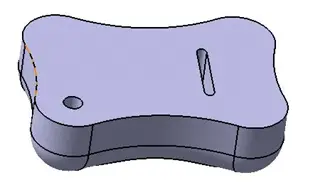
Step 7
We want four holes of the same size at each corner. Using Rectangular Pattern option, we will create remaining holes.

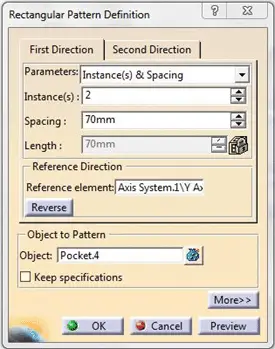
Similar to Circular Pattern, but Rectangular Pattern needs ‘direction’ to propagate. Here we can give two directions X, Y. To give direction, we can make use of any edge or an axis.
Use the same technique to create remaining 4 pockets as shown.
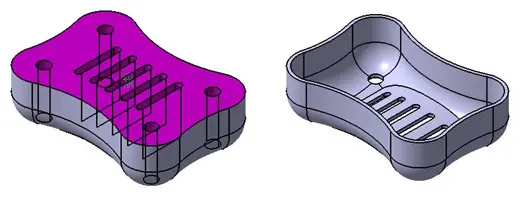
Step 8
Using Shell definition, make the block hollow. We will get following object.
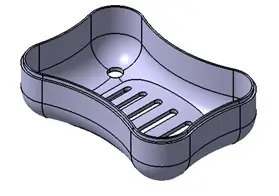
Step 9
To play one step further, we can create a little square cut around the upper edge, to make it look like a nice receptacle if a cover were to match this part in order to make it a complete soap case.
We will make a groove on the top. Using simple sketch and Pocket command you can get it done and have an image just like the one below.
Leave a Reply