In this tutorial, we’ll take a look at some simple but powerful tools in SolidWorks that you can use to turn three simple sketches into a coffee cup. This tutorial is a part of the series of tutorials we are creating for all skill levels.
The main tools we’ll be using to create the basic shape of our mug are the Revolved Boss/Base and the Swept Boss/Base features. Finally, we’ll use the Shell and Fillet features to complete the design.
What will you learn?
In this tutorial, you will learn the following topics:

[toc]
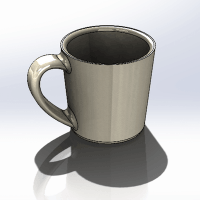
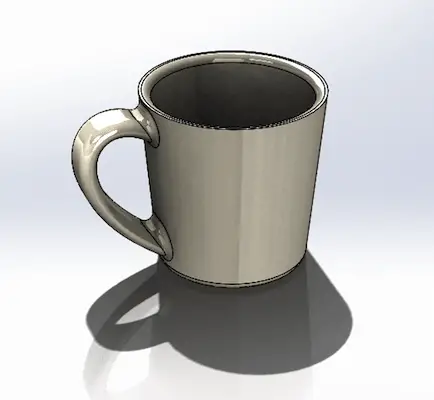
The final design we will create together is shown below:
Creating the Body of the Coffee Cup
Start by creating a half silhouette of the shape of the coffee cup. We’ll assume the cup portion without the handle is cylindrically symmetric. With this in mind, let’s create the sketch.
Select the Front Plane in the Feature Tree, and then select the Sketch button in the upper left hand corner of the screen.
Now, using the Line tool, create a sketch that looks like the picture below, starting at the origin, and dimension it as shown. Your sketch should have three segments so far.
Next, add a line running up from the far right point of the sketch, and close off the sketch so that you’ve formed a closed outline as shown below. This will form the basic shape of the coffee cup.
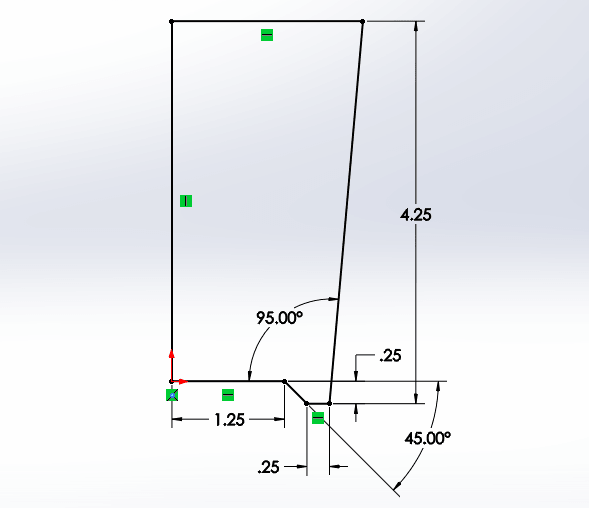
Once your outline is fully dimensioned as shown in the example, exit the sketch.
Creating the Shape using Revolved Feature
Select the outside left edge of the sketch you created, then select the Revolved Boss / Bass feature.
If the sketch is not visible, be sure to turn on sketch visibility by selecting View > Sketches.
When you’ve completed this, you will see a preview of the revolved shape you are creating from your half-silhouette. Select the green check to complete the feature.
Creating the Handle using Sweep Feature
Select the Right Plane. Using the spline tool, make a spline with only two points, and use the tangency controls at these points to form a shape for the handle, as shown below.
Be sure that the ends of your spline are located some distance inside the shape of the cup, as shown.
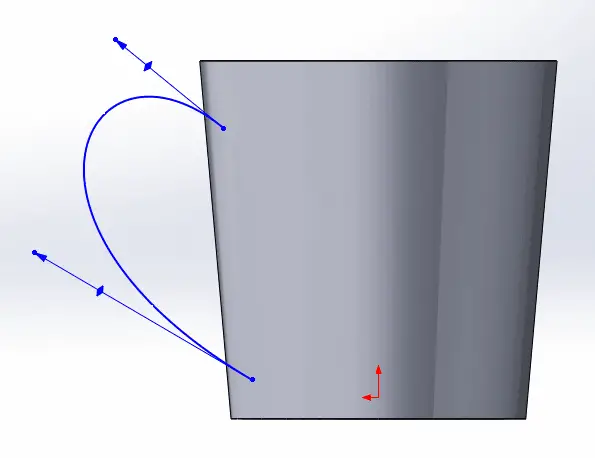
Exit the sketch. This shape will be used as a path which the material of the handle will follow.
Now, we need to create a sketch plane in order to create the outline of the handle profile. Select the top endpoint of the spline sketch, and select Insert > Reference Geometry > Plane.
Now, select the Front Plane from the feature tree. This should generate a new plane parallel to the front plane and coincident with the endpoint of your handle sketch. See the example image below.
Select OK, and create a new sketch on this reference plane.
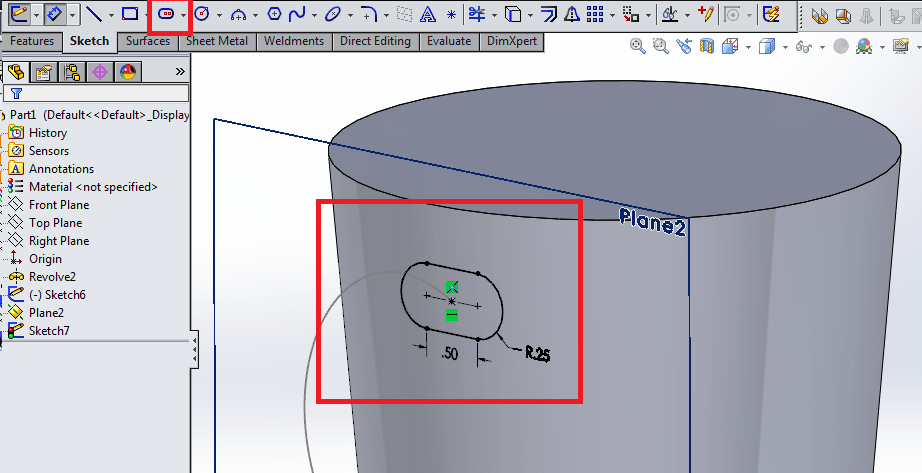
Using the Centerpoint Straight Slot, create and dimension a slot shape, locating the center point of this sketch coincident with the top endpoint of the spline curve. Then, exit the sketch.
Now, select Swept Boss/Base, and select the Profile Sketch and the Path Sketch as shown in the image below to generate the shape of the cup handle.
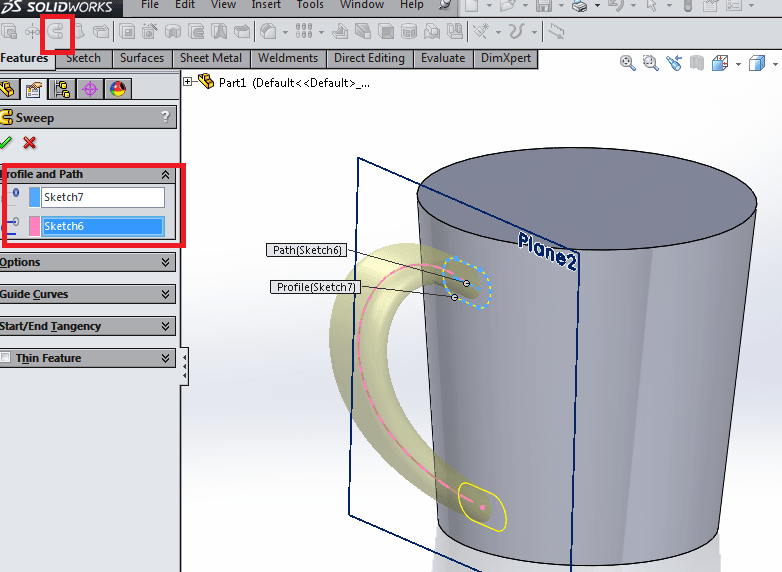
Select OK to complete the feature.
Final Steps and Detailing
Finally, we’ll create the cavity of the cup and add a few fillets to improve the appearance of the model. Select the Shell feature, and select the top face of the cup feature, where the cavity should be.
In the Parameters box, type 0.25 in.
Finally, we’ll add a bit of detail to make our model more realistic. Select the Fillet tool and create a series of fillets with a radius of 0.20 in.
Select the two inside edges of the cavity (at the inside lip and the bottom inside edge), the two edges where the handle meets the body, and the bottom outside edge of the cup. Select OK to create these fillets.
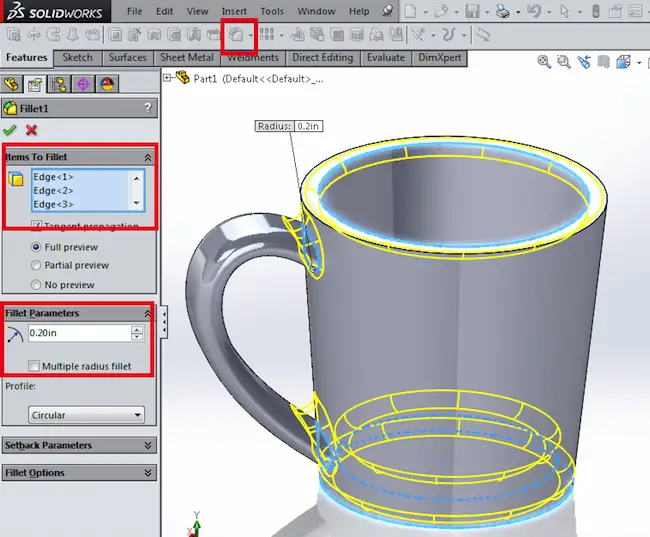
The final design will look similar to the image below:
Final Thoughs
In this tutorial, we learned several important features in SolidWorks. This features included Revolved Boss/Base, Swept Boss/Base, Shell, and lastly, Fillet features. Using these features, a simple coffee mug was created.
You can now use these skills to create your own designs. If you have any questions, please leave a comment below.
Check out the other tutorials to learn even more about SolidWorks!
Leave a Reply