The last tutorial focused on rendering in V-ray and was specifically an introductory reference manual for beginners to rendering with SketchUp. As can be seen from the list below, V-Ray is a popular choice for people and the SketchUp team. But the list is also witness to the fact, that there are other plugins that offer more resources and conveniences that either V-Ray does not offer or does not accommodate in the same manner. For that reason, we will review the top 5 best rendering softwares for Sketchup.
According to Sketchup’s own website, the following plugins are recognized as a few of the best and most stable rendering programs for Sketchup due to their extendible functionality and technical support.
- V-Ray for SketchUp
- Twilight Render
- Thea Render
- SU Podium V2
- Podium Walker
- Shaderlight
- Renditioner/Renditioner Pro
- Render[in]
- Raylectron
- Maxwell for SketchUp
- LumenRT
- LightUp for SketchUp
- IRender nXt
- Indigo Renderer
- Caravaggio
- Bloom Unit
- ArielVision
Note: This is a product comparison, which basically highlights what you can do with each plugin better, faster and cheaper. The actual process of rendering is pretty much the same, since you will create a scene, add the material, and click on render. The difference lies within the actual processing that takes place behind the scenes, as the rendering engines and the relevant light-synthesis and material development modules are implemented in different ways. That’s what sets the plugins apart and defines their dominance in their respective domains, even though they are all just rendering plugins.

In this article, we will review the top 5 rendering programs for Sketchup.
[toc]
Indigo Renderer
Although free only on trial basis, I have to put this on the top according to my preferences for rendering plugins for Sketchup. The price is high for the actual license but in my opinion for somebody whose source of income is rendering in Sketchup, I would say it is well worth the price. The reason why a paid software is much better than the rest (in my personal opinion) is not due to the technical support or 24/7 customer care service, but the built-in facilities are so precisely measured based on real life physics’ principals that the resultant render is nothing less than absolutely breathtaking. This is because of the advanced set of physics principals in place. Let’s take a look at some of the features on by one:
First, Indigo render offers support to the following 3D applications:
- SketchUp
- Autodesk 3DS Max
- Cinema 4D
- Maya
- Blender
So without a doubt, it basically allows subsystem integration in to a range of software and enables you to use the same rendering settings across all the supported platforms using an exported XML configuration file. Voila, the arsenal of 2D/3D apps are now on the same page thus making our lives easier.
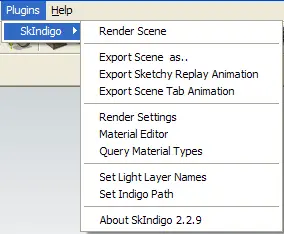
Second, the interface is simple and compact taking into consideration the flexibility and array of functionality as can be seen in the screenshot of the only menu that Indigo adds to the default Sketchup interface:
Following this, the lighting system of this plugin is top-notch. V-Ray gets its name from ray-based simulation techniques, the very same that are used by Indigo, but with a much more powerful physics processor and scattering/phase functions. These functions basically address the light scattering modules such as the Sub-Surface-Scattering and Wavelength-dependent-scattering properties of life, which are powered by the very same physics processor. Since the light scattering modules are so strong, it only makes sense that the camera visualization technology must be just as empowered. And it is! Aperture, focal distancing, lens shifting and the latest addition of Orthographic and Spherical cameras are just off the hook. Add to that the online materials database and the reality-specific materials (see below) make a designers life easy and work distributable (if he/she wants).
Furthermore, Indigo render (or should we say the team) is ever-popular for its innovation and quick implementation of newer methods and techniques of 3D rendering. Hence it is not surprising that this is one of the few plugins that offers features such as section planes (as shown below).
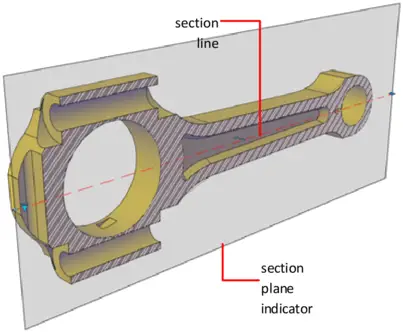
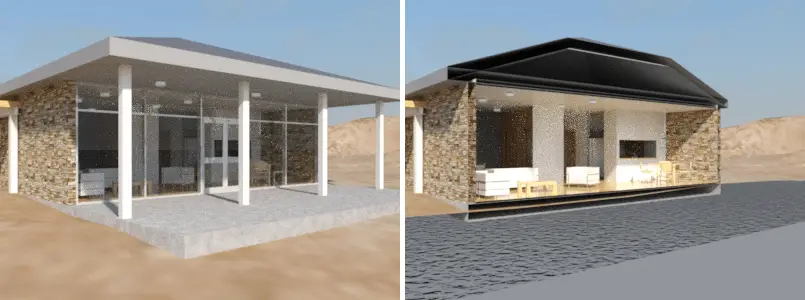
Section planes are an abstraction of the concept of grouping objects with a specific purpose. Basically, section planes are meant to group together parts, which can be removed from view without being removed from the scene, so as to enable the interior to become visible. This is opposed to having to enter the model with the camera and then “walk around” as if you would when standing inside a complete structure. With section planes, you can hide the entire section from view, for a while and show the interior without the need to change views or perspectives.
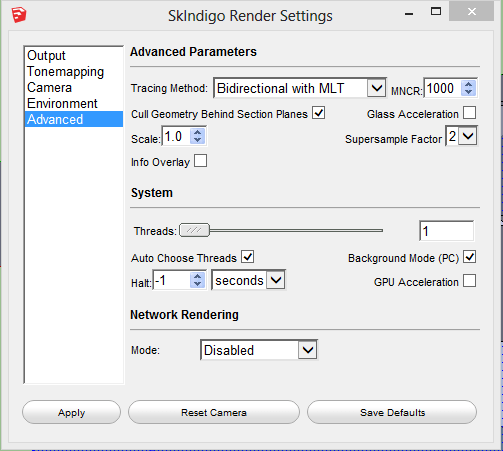
Moreover, features such as network rendering (using multiple machines to render a single project) and a menu as simplistic (simplistic in usage while maintaining the complexity and diversity of features as shown below) make Indigo Render for Sketchup an ultimate choice for the professional designer.
Maxwell Rendering Plugin for Sketchup Review
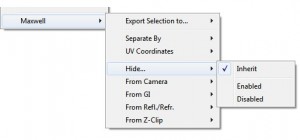
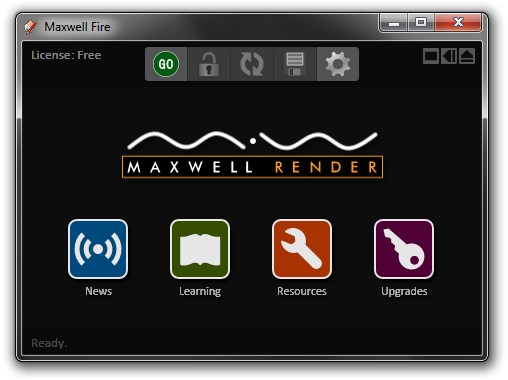
Maxwell for SketchUp is a rendering package, unlike Indigo specifically designed for SketchUp. Its simplicity and extendibility lie in the fact that it is a self-contained package that adds itself to the SketchUp interface, much like most extensions but allows for a far easier rendering experience than any other extension. Since Maxwell for SketchUp (and yes, that is the complete name) is most powerful when bought for a substantial amount of cha-ching for a license, I’m not going to name it #1 in my opinion, but otherwise, the ease of the rendering experience brought on by Maxwell for SketchUp is easily the best option for people who wish to begin rendering or are completely new to the concept of rendering at all. The tutorials and reference material available by the developers is of immense intellectual value and is organized in a direct, no-fuss-no confusion manner. Even the interface as seen below is simple, with a context menu highlighting only the most mundane options (see below).


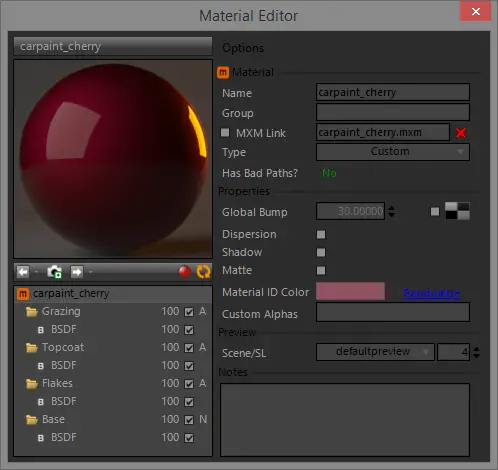
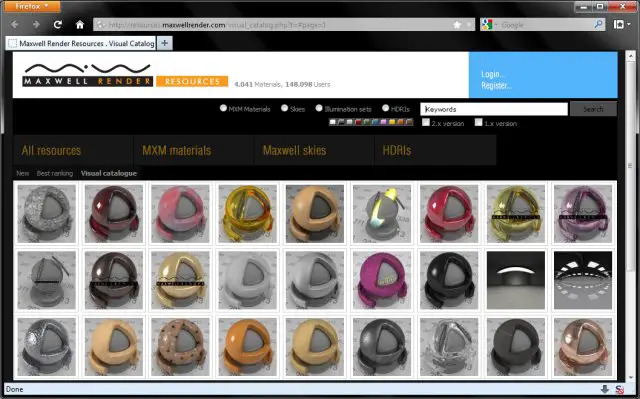
Talking about the unlocked, fully paid, licensed hardcore version of Maxwell for Sketchup, we can see the clear difference amongst this and the rest of the plug-ins available. The unlocked version allows network rendering, with a maximum of 10 rendering nodes (which can be dynamic stations since the license is a floating one and not locked). The material editor gives you the capability to create your own materials from absolute scratch (see below), edit the ones that are publically shared on the website/online-warehouse and further use the ones that have been made available by other users/developers at no extra cost unless the developer is selling the material in question.
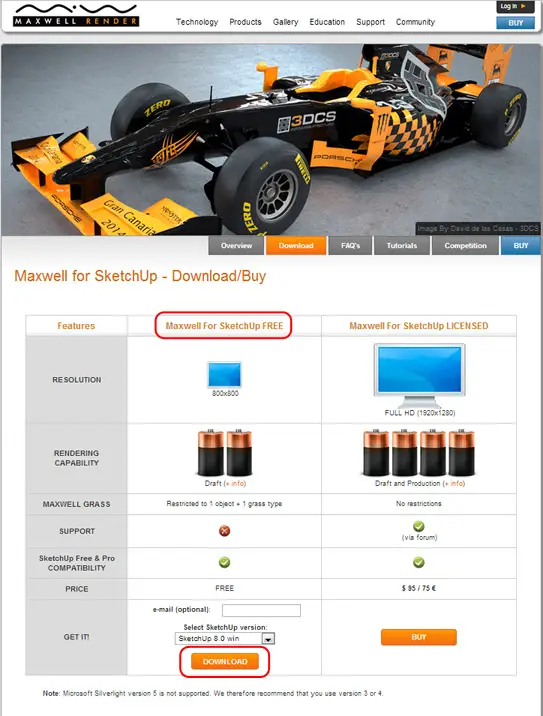
Moreover, the rendering output on the complete license provides rendering outputs of more than 1080p. Yes… more than 1920 X 1080p resolution. Even if you want to go into 4K, this render will not only allow it, but will also streamline the rendering over the network on Windows/Mac OS as well as Linux. Furthermore, the rendering output will support all formats channels, more than the default 8-bit per channel RGB default (isn’t that a treat!). The table below is taken from the official website for a product/license comparison:
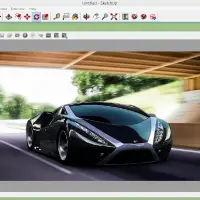
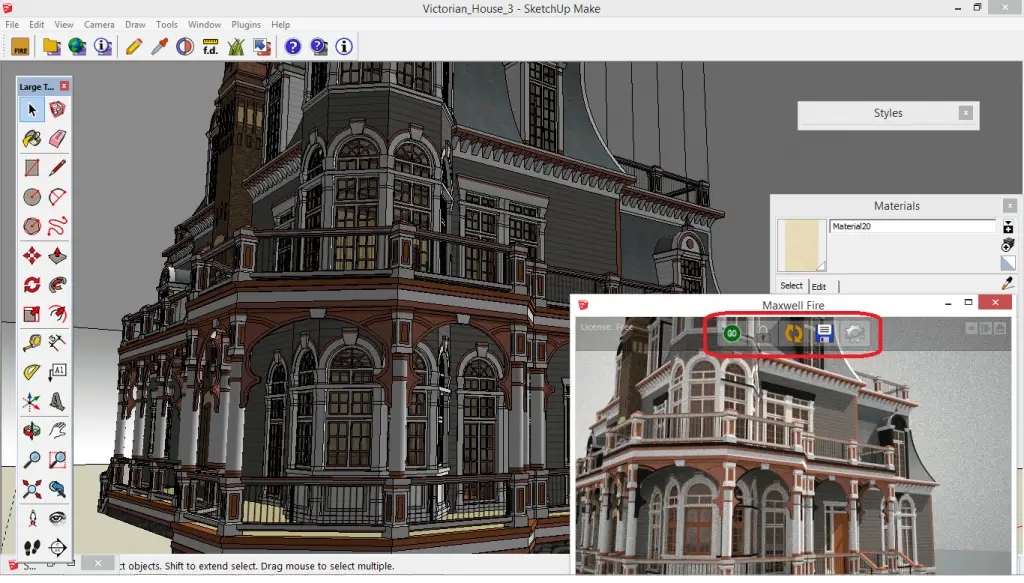
Following this, the rendering engines capability not only allows drafting and production, but goes one step further towards real time rendering preview. That means, if you render a project and then make a change, the change is reflected in the render preview ASAP. This live preview rendering also supports the capability of taking pictures/snaps of the preview from within the preview without any special technique or extension(see below), allowing you to continue with live rendering updates while saving your progress in a chronological, photo-based, timeline-sort-of-manner. This coupled with the fact that Maxwell for SketchUp is fully integrated into SketchUp means no extra software. Hence, you can effectively create, edit, capture and enhance/update your project all from inside SketchUp’s default interface.
The above mentioned reasons are what make this extension standout from the rest. If it weren’t for the high price (in my opinion) of the complete license, I would have easily put this on the top of this list.
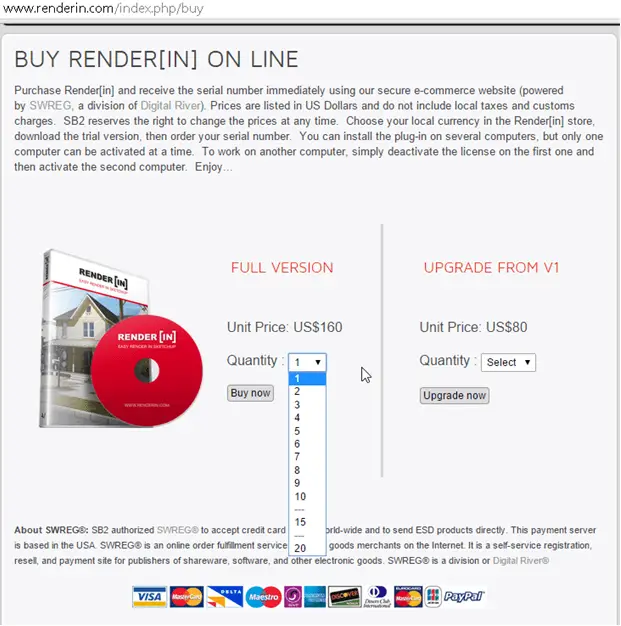
Render[in] Review
Render[in] is another very powerful plugin for SketchUp but with a limited domain. Its main focus is on the wysiwyg “what you see is what you get” philosophy, but even in this limited domain, it offers extensive flexibility and functionality. Developed for SketchUp, it offers the designer the ability to lead the camera in the render preview window without any additional configuration. If you change perspectives or “walk around” in the scene/project, the preview window moves with you, following all your movements. Coupled with the fact that this plugin allows limitless rendering dimensions (even in HD) makes this plugin one of the most economical extensions when it comes to paying and licensing.
Moreover, the new “Radiosity engine” implemented in this plugin offers immense control over photography-relevant features such as color-texture perception, glow and shine synthesis, ISO and aperture metrics and shutter parameter controls allowing this lightweight plugin the capability to contend against the heavyweights of the industry when it comes to artificial light sources. The very same improvements have been witness to enhance rendering speeds averaging up to 2X.
Two new features that are in my knowledge, only available in Render[in] by default are panorama walkthroughs and bump mapping. Panorama walkthroughs (see below) have been implemented for those of us, who wish to create virtual tours of the insides of the project. The multi node feature allows different points of views for your virtual tours and adds to the multi-perspective viewing. Going one step further, the built-in features deliver website playback capability based on “Flash” technology and are fully compatible with Windows, MacOS, Linux and the mobile based Android OS. For users of IPhone and the Apple-mobile platform, a single extension creates compatible version for viewership and sharing. Render[in] has a special proprietary application called the Ivisit 3D app, which comes in lite and pro versions and can be downloaded from the official website.
![Render[in]’s multi node panorama](https://www.computeraideddesignguide.com/wp-content/uploads/2015/06/18_renderin-panoramas-1024x593.png)
![Render[in] bump mapping – The light calculations differentiates the bumps on the right side from the plain (bump-map free) render on the left hand.](https://www.computeraideddesignguide.com/wp-content/uploads/2015/06/19_renderin_bump_map_walls-1024x595.png)
Furthermore, the Render[in] plugin gives two features that are also available elsewhere but are extremely handy for the all rounded designer whether architect or automotive part director. The two capabilities are exporting your final render to a PSD file for Adobe Photoshop manipulation, with each layer containing its own rendering information within it making the package complete and not just another transparency-enabled image on top of another. Second, this plugin allows a complete export of your render and render configuration to the ever-powerful Artlantis, one of the most complete and powerful, independent rendering software on the face of the earth. Artlantis will follow in the list (the only reason that it’s so far below is because of the price {no free version is available except for a trial version, so beginners and hobbyists don’t really need to go for it.} The other reason is that it doesn’t attach itself to SketchUp, its standalone and independent, so draw up your layouts and designs and then export the file over to Artlantis, not really my thing.)
Apart from all these special features, Render[in] offers much more functionality such as the artificial environments and skies/clouds systems which render themselves automatically with a hint of randomness adding to the natural appeal of the scene… usually, the flow of the water or the placement of clouds in the sky is iterative and based on a set pattern that when implemented in a large scene or seen from a further away perspective give away their repetitive, calculable, algorithm-based nature, whereas in Render[in] the randomness seems natural and adds to the scene’s natural appeal (see below). This is also true for grass, earth, water and other natural entities which are supplied with the plugin or available on the online warehouse portal. Specific to clouds, here we have the choice of 4 different clouds that can be mixed as per our own will for the choice of sky we wish to present.
![Render[in] enhanced sky and lighting systems – adding a more natural appeal based on the randomness and choice of cloud types available as part of the “Radiosity” engine](https://www.computeraideddesignguide.com/wp-content/uploads/2015/06/20_renderin_env-1024x594.png)
Thea Render
Thea Render is another plug-in developed for rendering with applications such as SketchUp and others. Its complexity, learning curve and the know-how required for product comparison are what put this plug-in at the 4th position. In order to introduce this plug-in, a few points need to be explained with special focus before we address the plug-in itself. First let’s talk about the rendering engines:
Unbiased Engine (TR1/TR2)
As explained by the official website, the “unbiasness” factor basically addresses the artifact-independent rendering schemes which take on the rendering challenge without any virtual “checkpoints” or “constructs” to aid the rendering process. This is the opposite of the biased engine. This enables the rendering engine to understand the lighting and project scope as-is without any synthetic constraints to contain leakage of shadows and other issues which present themselves in the absence of a natural physical system.
This kind of engine has several benefits over others:
- The TR1 and TR2 are two types of engines, with the same foundation. The difference lies in the fine tuning, where TR1 focuses on direct lighting such as outdoor scene rendering and TR2 focuses on indirect and caustic lighting, such as the light produced indoors by a sun outside.
- All lighting systems/possibilities are calculated and then compared for the most accurate representation before the final render is presented. This may take up more time than usual but is best in terms of accuracy and efficacy of complex lighting systems.
- Light simulation systems are developed based on a mathematical simulation algorithm which means accuracy depends on your configuration and the resources you supply the program with. Accuracy of the rendering engine itself, will spare no cost when developing artifact-independent focus based on a full-spectral space. This also means that advanced photography features such as spectral specific refraction and volumetric scattering of light are now under your control.
- On the one hand, the configuration greatly effects the output. On the other, the unbiased engine (due to its artifact-independence), the default settings and configurations are tuned towards natural rendering, hence even with zero-effort the default setup itself can aid designers who have no knowledge of photography or relevant factors.
Biased Engine (Adaptive BSD)
Again as explained by the website, the biased factor is due to the exact opposite of the unbiased philosophy. Here, virtual constraints or “artifacts” are added as a check and balance mechanism in order to perpetuate the visual scheme as accurately as possible and to render a final output with a high quality render adaptive to human perception. This perception and the final render based on this perception is the main visible differentiation between the two rendering engines. Following this, the “adaptive” title also refers to the human perception phenomenon, offering effort to the scheme or part of the project that has more focus so that the human eye is accommodated best, and part of the scene that maybe neglected due to any cause are given less effort. For instance, in a 1920 * 1080 scene picturing a house and its driveway, the car parked outside would require more focus rather than the trees in the far back (or the ants on the pavement, if you chose to put them there).
Following are the main advantages of choosing this engine:
- Much like Render[in] but more powerful, the adaptive BSD Thea engine reigns supremacy over the virtual tour/walkthroughs domain. This is so, because the Thea rendering engine first calculates a global lighting environment then uses that template to accommodate all the artifacts and upcoming scenes in the animation/walkthrough. Hence the lighting system is most subtle and obedient to the change in perspective and viewing/camera angle no matter where the camera ends up in the scene.
- Shadow catching is a technique where a 2D image is added to final rendered scene with the addition of an artificial shadow in order to make the photo look like it is part of the final scene as opposed to standing out like a 2D photo simply layered top of the rendered image. This is the same system that the Thea engines uses to simulate bump mapping as opposed to the conventional technique of normal bumping.
- Field mapping. This is a proprietary technique available in this Thea rendering engine only. This is where the wall/structure is so complex that light calculations may fail to reach the interior or sides properly. The field mapping system calculates the entire field for the purpose of evaluation before the final render is produced. This is just like the global environment developed before the final render as explained in point #1.
Presto Engine (GPU+CPU)
The raw power of all your processing units combined, a simultaneous processing subsystem that unites all the available CPU cores and the GPUs in order to push the rendering resources to their limits. This engine is designed for systems with multiple processors containing multiple cores, added GPU resources, and possibly a few networked rendering nodes.
The best things about this engine/technique are:
- Polygon-specific instancing – The way the new engine has been developed, taking into consideration the flaws/shortcomings of the old, polygon-based manipulation (no matter how many or how small) is so seamless, there is absolutely no approximation in the rendered output.
- This is a rendering engine that can be used as an add-on to the Thea studio, meaning your primary rendering can work without it. However, if you really want to pump up your efforts, the new Presto V1.4 is the way to go (see below).
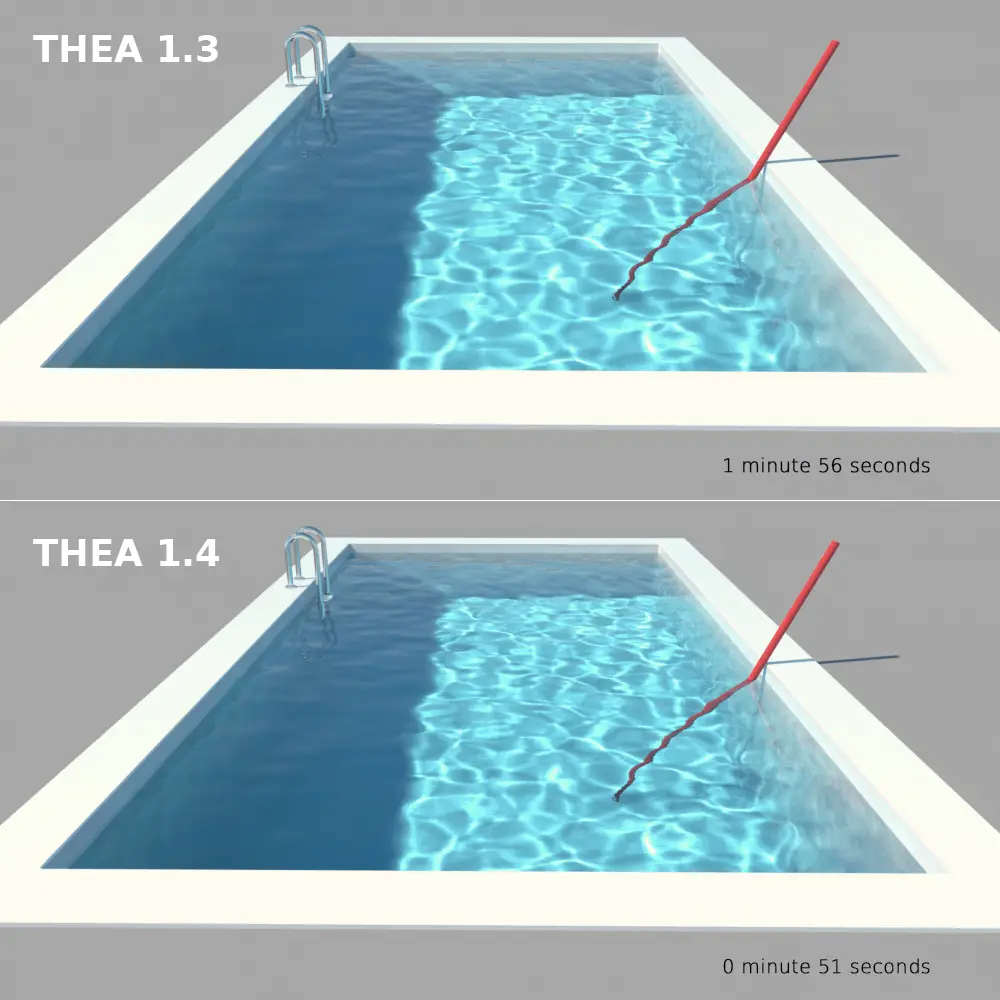
The following text contains examples and references comparing the Thea render plug-in with other plug-ins as well as comparing the properties of different engines. The first and my personal favorite feature is motion blur. The Presto engine accommodates the motion blur feature very well (see below), allowing a range of techniques and algorithms to compute the blur and render the final output according to the desired caustics and animatronics. The motion blur algorithms are, in fact so strong, the blur’s rendering has its own module in the engine as opposed to just another header file within the source library set.

Moreover, this rendering engine also provides the user with the capability to access multiple layers/channels in order to access shadows and masks of artifacts, a capability not introduced thus allowing the designer to not only transport all the rendering configuration to PSD or other layer-compatible software/format but also allowing the designer to fine-tune these artificial accessories directly i.e. without the involvement/control of the artifact itself.
Caravaggio Renderer in Sketchup
This product suite is a less popular one, but leaves nothing to chance or gimmick when it comes to pro-like rendering for beginners. Built for the Windows platform, this product suite comes in two parts and for two software packages.
One version is for Rhino and the other for SketchUp. Obviously, we will be talking about the SketchUp version, but within the choice of platform, there exist two further options. One is the Studio version, which is a standalone software meant for an independent, complete, single unit studio version, whereas the Render version is meant as a plugin for Rhino and SketchUp. We will be focusing on the plugin version, because not only is that the aim of this catalogue, but also due to the fact that the plug-in version makes it much more standardized for the SketchUp designer to learn and use.
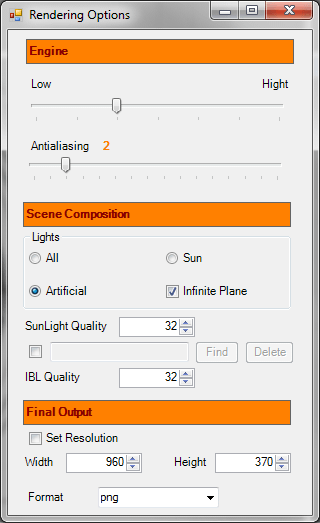
The developers state that the plug-in has been developed to respect the platform/software it is used with and there couldn’t be more truth to it. The plug-ins philosophy is to highlight the rendering capabilities in respect to the preliminary design and production properties as dictated by the design of the project/scene. This is so true in fact that the plug-in’s default settings give the designer a single criteria to tune all the rest of the properties on its own. Now, it is possible for the designer to take over the default settings and tune each property him/herself and it is also possible that a programmer write the actual script needed for the render. The main criteria, as the official documentation states is the time the designer wants to put into the rendering operation by selecting a few of the most common and easy-to-understand parameters (see below) and moving onto the rendering phase in less than a minute.
The power of Carravaggio lies in its ability to produce most of the special functions as listed above without the need to have a solid understandingof photography or physics related concepts. This and the simplicity of the interface are the reasons why this plugin is on the list and also the reason why it is in 5th place of the best rendering software for Sketchup. A must have for beginners looking to go pro while not really sure as to which modeler to use.
Conclusions
I hope you learned something today. We reviewed the best rendering software for Sketchup. Stay tuned for more tutorials and articles about Sketchup!
Leave a Reply